Learn Access Now! Chapter 8 Previous Section in Chapter 9 Next Section in Chapter 9 Chapter 10
Chapter 9: Creating Custom Forms
(This is section 3 of 4 in this chapter)
Defining Your Own Forms
When the Wizard's forms don't meet your needs, you can use the form Design window to create your own form or edit an existing form. While the form Design window gives you much greater control over how your form works than the Wizards do, using the form Design window is a much more involved process than using the Wizards.
Note: This section uses the My Friends.mdb database you have used in several chapters of this book, most recently in Chapter 8, "Creating Simple Reports." If you do not have that database available, you may want to use the Friends 2.mdb database located on the CD-ROM. You should copy the file to a directory on your hard drive and rename it My Friends.mdb.
To create your own form, click your mouse on the Forms button in the Database window. Then double-click your mouse on the Create Form in Design View option. Access displays the form Design window shown in Figure 9-10.
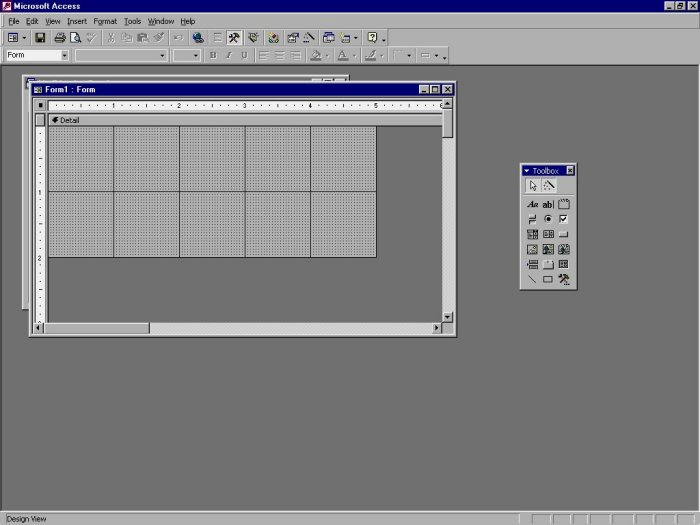
Figure 9-10 The form Design window.
There are several items you should notice in this window. First, notice the toolbar has some new tools on it. You will learn the purpose of each tool later in this chapter. Second, notice the form Design toolbox. You will use the toolbox to put together your form. As such, the toolbox is described very shortly.
The main part of the Design window contains a grid. This grid becomes your form. The idea is to design your form by placing objects on the grid. Objects can be fields or things such as labels, buttons, controls, or other items. You will learn how to place objects on the form grid later in this chapter. These objects have properties which specify how they appear and behave.
Editing Existing Forms You can edit existing forms using the same techniques you use to create new ones. Select the form name from the Database window, and then click your mouse on the Design button. Many people use the Forms Wizards to create a base form, and then use the Design window to change the form to meet their needs.Notice that the form grid is not very large; it is only two inches high by five inches wide. If you want to increase the size of the grid (and thereby increase the size of the form you are creating), move the mouse pointer over one of the outside grid borders. Next, hold down the mouse button and drag the border to a new position. When you release the mouse button, the grid remains enlarged.
Note: You can enlarge or reduce the size of the form grid at any time. You will need to enlarge the grid to add new objects, and, before you reduce the size of the grid, you must remove any objects that appear in the part of the grid you are eliminating.
Attaching a Data Source
If you are not editing an existing form, chances are good that the form you are creating does not have a data source identified for it. The first task in creating a new form from scratch is to identify a data source. Follow these steps:
- Click your mouse on the Properties tool on the toolbar. As an alternative, you can choose Properties from the View menu. Access displays the Properties dialog box for your form.
- Make sure the Data tab is selected. Access displays the Properties dialog box as shown in Figure 9-11.
- Examine the Record Source property. If there is something in the property, then you already have a data source defined for your form. In that case, you can skip the next step.
- Select the Record Source property and use the pull-down arrow at the right of the property to select My Friends as the record source. (Remember; My Friends is the name of the table you created in the My Friends database.)
- Close the Properties dialog box by clicking your mouse on the Close button in the upper-right corner of the dialog box.
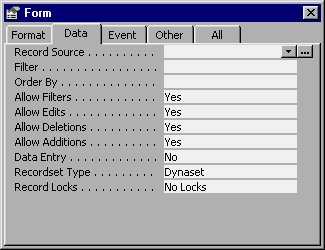
Figure 9-11 The Properties dialog box for the new form.
Notice that the Record Source is a property for your form. Later in this chapter you learn more about how to change properties for your form.
The Form Design Toolbox
Somewhere on your screen is the form Design toolbox. (In Figure 9-10, it is located at the right side of the screen.) This toolbox contains objects which you can place in your form. These objects are often called controls. You can alternately hide or display the toolbox by clicking your mouse on the Toolbox tool on the toolbar or by choosing Toolbox from the View menu. The toolbox contains the 20 tools detailed in Table 9-1.
| Tool | Description | |
|---|---|---|
| Select Objects | The arrow, used to select existing objects on the form. | |
| Control Wizards | When selected, Access uses Wizards to help you create controls on your form. | |
| Label | Places text on the form. | |
| Text Box | Obtains some sort of user input or displays an existing value, such as the contents of a field. | |
| Option Group | Groups toggle buttons, option buttons, and check boxes together. Any of these objects within an option group is mutually exclusive (only one can be selected in the group). | |
| Toggle Button | An on or off button. When it is selected, it is considered a True value. | |
| Option Button | Sometimes called a radio button. Appears as a circle; when selected, it is filled in. | |
| Check Box | Appears as a square; when selected, it has an � in it. | |
| Combo Box | A list box with a text box at the top of it. | |
| List Box | A box containing a series of values from which the user can choose. | |
| Command Button | Runs a macro or Access Basic module. | |
| Image | Inserts an image in the form. | |
| Unbound Object Frame | Links and displays a picture, graphic, or other OLE object. The object is not stored within a table or query. | |
| Bound Object Frame | Same as an object frame, except the object is stored in a table or query. | |
| Page Break | Splits a form into two screens. | |
| Tab Control | Used to add tabs to a form, just like many dialog boxes contain tabs. | |
| Subform/Subreport | Adds another form or report to the existing form or report. Typically displays information in related tables. | |
| Line | Draws a straight line. | |
| Rectangle | Adds a rectangle or square. | |
| More Controls | Allows you to add additional controls the the Toolbox. |
Table 9-1 Tools in the toolbox (from top to bottom and left to right).
Note: You can use your mouse to move the toolbox or change its size. Point to the title bar of the toolbox and use the mouse to drag it to a new position. Point to the toolbox border and use the mouse to drag it to a new size.
To place a control on your form, click your mouse on the tool that represents the control you desire and use the mouse to indicate where you want the control on the form. For instance, if you want to place a text box, first click your mouse on the Text Box tool. Then, use the mouse pointer to indicate where you would like a corner of the box. When you click and hold the mouse button, Access anchors the corner of the box. As you drag the mouse, the text box gets larger. When the box is the size you desire, release the mouse button. The text box will remain on the form. You can place any other control in the same manner.
Once you place an object on a form, you can move it or resize it by using your mouse. Every object, when selected, is surrounded by handles. These are small squares that reside around the perimeter of the control. You can use your mouse to drag these handles to new positions, which resizes the object. If you simply point to the edge of the object and hold down the mouse button, you can drag the entire object to a new position on the form. When you release the mouse button, the object stays at the new position.
Note: You can tell when you can move an object because the mouse pointer changes to a hand. On some objects, the hand appears when you pass over the edge of the object (not where a handle is located). On other objects, the hand appears when the mouse pointer is in the center of the object. Just move the mouse around until the hand appears, and then you can use the mouse to drag the object to a new position.
Placing Objects on Your Form
Assume you want to create a form so you can review the records in the My Friends table one at a time. Further, you want to give the form some "personality." You start this task by using the form Design window in much the same manner as you would use a paint or drawing program. You place an object, refine how it looks, and then place another object. You repeat this process until you achieve the desired effect.
Your first task in creating your form is to adjust the size of the form grid to the size you think you will need. You do this using the mouse, as described earlier. You can then change the background color of the form as a whole. To assign the form's background color, select the form (just click your mouse on the form grid) and then adjust the color using the Fill/Back Color tool on the toolbar. (This tool looks like a small paint bucket.) Click your mouse on the down-arrow to the right side of the tool, and Access displays a color palette. You can set any color you desire, but it seems that light gray is typically in fashion these days. Click your mouse on the color desired. If you pick a color other than the current color, notice that Access shades the entire grid with that color.
Placing a Label Object
Next, you will probably want to have some sort of a title on your form. To assign a title, place a Label object. In the toolbox, click your mouse on the Label tool (the one with the capital A in it). Place the label box near the form's upper left corner and size it all the way across the form. At this point, the Design window will look like what is shown in Figure 9-12.
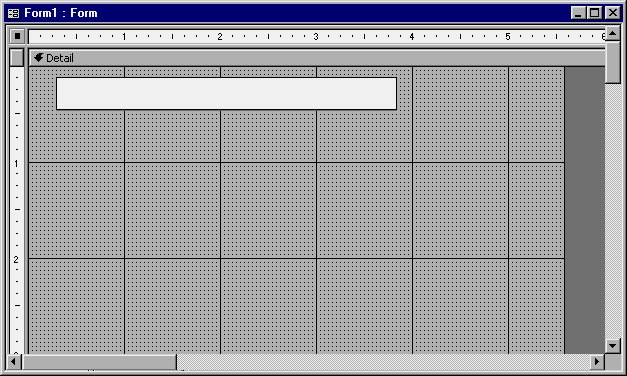
Figure 9-12 After placing the Label box.
Access is now waiting for you to type the text that should appear in the label. Type the words My Friends, and then press ENTER. The text should appear at the left side of the box and handles will appear around the box. You can now set colors for the object. To make the box itself seem to disappear, so all you see is the text, set the background color (using the Fill/Back Color tool) and border color (using the Line/Border Color tool) either to the same color you used for the background of the form or to Transparent. You can then set the text color using the Font/Fore Color tool to something such as red.
Notice the toolbar at the top of the screen. When you have selected an object that contains text, the text controls are active. You can set attributes such as text alignment, font, point size, and so on. You should probably change the text attributes for this label so the text looks more like a heading for your form. Figure 9-13 shows how the Design window appears after changing to 14-point bold Tahoma, centered in the box.
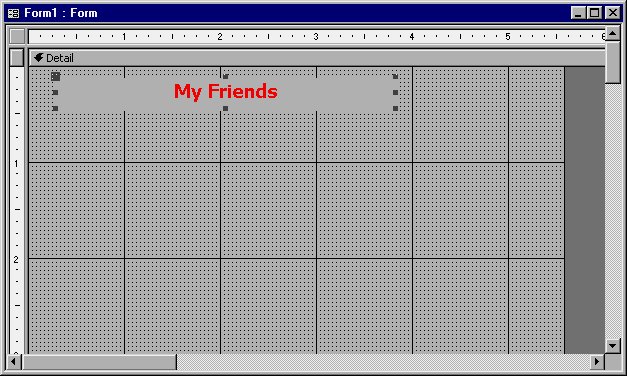
Figure 9-13 The finished heading for the form.
Placing Fields on the Form
Now you are ready to place your fields on the grid. To begin, select the Field List option from the View menu. This displays the field list for your data source (the My Friends table). Next, use the mouse to select a field and drag it onto the form. For instance, click your mouse on the FirstName field and then drag it onto the form grid. When you release the mouse button, Access places two objects on the form: a Label and a Text Box. The Label contains the Caption property for the field, and the Text Box contains the name of the field itself, as shown in Figure 9-14.

Figure 9-14 Placing a field on the form.
You can use the mouse to individually position the Label and Text Box objects on the screen. (If you move the Label some and move the Text Box so it is separated only slightly from the Label, you will find they look better.) Use the color and formatting controls on the toolbar to adjust the objects so they blend nicely on the form. When you are done, the Label and Text Box objects should appear similar to what you see in Figure 9-15.
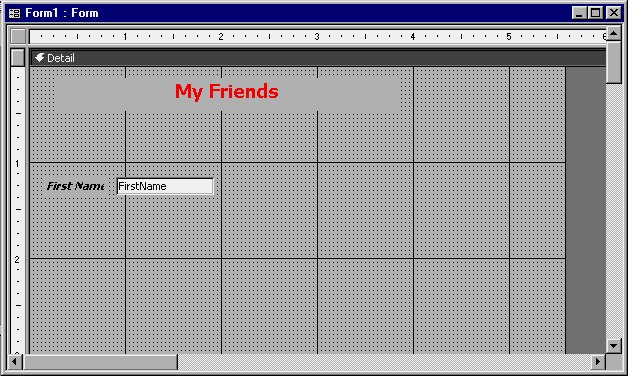
Figure 9-15 Formatting controls.
It would be nice to change the caption in the Label object so it only says Name instead of First Name. In this way, users can input an entire name to the right of the Label object. To do this, select the Label object. As you move the mouse pointer over the Label text, notice that the pointer changes to an insertion point. Click the mouse button, and you can change the text in the Label object quite easily. When you press ENTER, Access makes your change.
Note: Whenever you change the text in a label, you may also want to change the size of the label object or the text alignment. Make any adjustments you feel necessary to make the objects look their best.
Now you are ready to place the field for the middle initial. You do this in the same manner that you placed the field for the first name. Simply click your mouse on the field name (Middle Initial) in the field list and drag the name onto the form grid. Position the mouse pointer so it is just a little to the right of the Text Box used for the FirstName field. When you release the mouse button, Access places the two objects on the form, as shown in Figure 9-16.
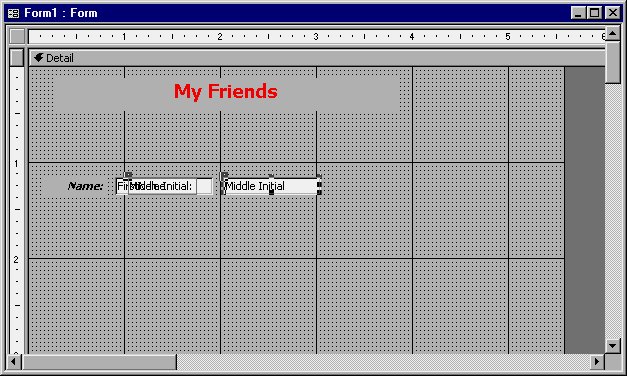
Figure 9-16 Placing a second field.
Notice that the Label object overlays the previous field you placed. Since you don't really need the middle initial label anyway (since the previous label object, Name, is adequate for the entire row), use the mouse to select it and then press the DEL key. The Label box disappears, but the Text box remains. You can now position the Text box and change its attributes and size so it looks good with the other objects.
You can now go through the same process to place the LastName field. The resulting Design window is shown in Figure 9-17.
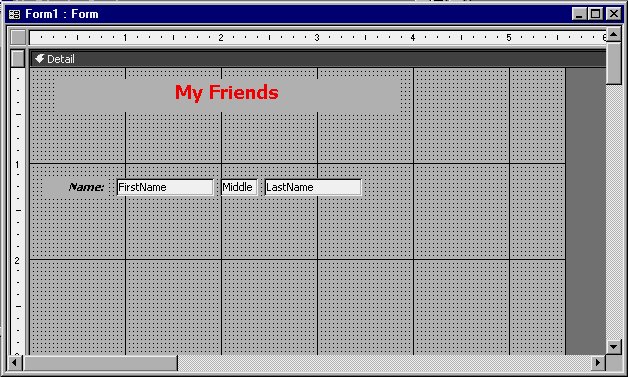
Figure 9-17 The first line of the form is complete.
That's basically all there is to placing fields on your form. You should go ahead and place the rest of your fields, positioning them and changing their attributes so they look good. Use the same techniques you learned in placing the first three fields. (Don't place the Christmas Card field yet; it will be covered in the next section.) Figure 9-18 shows what the completed Design window should look like (minus the Christmas Card field, of course).
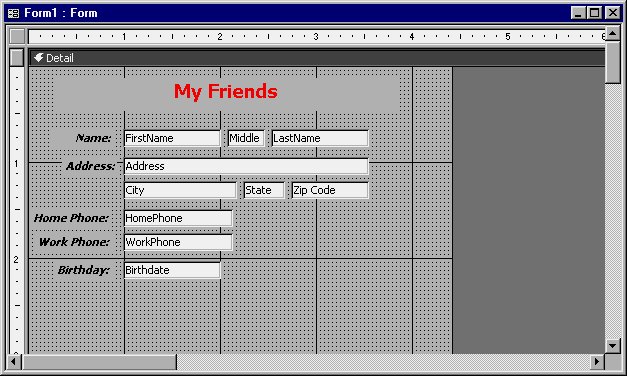
Figure 9-18 A form that is almost completed.
Placing a Check Box
The final field you need to place is the Christmas Card field. You may remember from Chapter 2, "Access in an Hour," that this is a Yes/No field that indicates whether you should send a Christmas card to an individual. Represent Yes/No fields with any of the following objects:
- Toggle Button
- Option Button
- Check Box
Any of these controls can indicate a Yes/No or On/Off condition--the only difference between them is their appearance. Their effect on a user may be quite different, however. For instance, a toggle button indicates if something is on or off, whereas the other two more accurately represent yes or no. The actual object you use is up to you, but for this example, place a Check Box object.
To place a check box for the Christmas Card field, click your mouse on the Check Box tool in the toolbox. Then, drag the Christmas Card field from the Field List to your form. When you release the mouse button, Access places two objects on the form: the Check Box object and a Label object. This is shown in Figure 9-19.
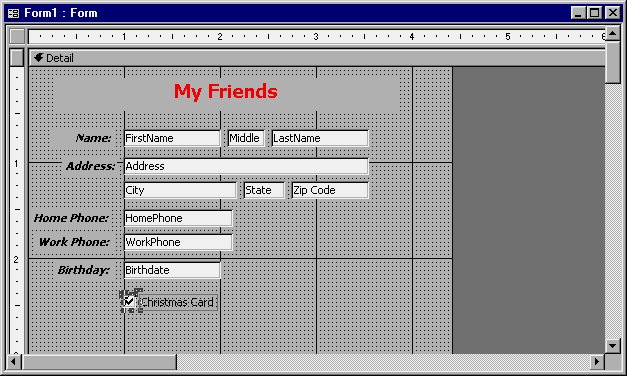
Figure 9-19 Placing a check box.
Notice that, unlike when you placed the other fields, Access put the Label object on the right side of the Check Box object (instead of on the left). Access uses the right side to keep with the regular interface guidelines for Windows. Go ahead and position the form's objects and format them so they look proper. You will also want to change the text in the Label object so it reflects the purpose of the check box; you could change it to something like Send Christmas card?
Understanding Properties
By this point, you should already be familiar with the concept of properties. You already know that Access uses properties to describe how an object appears or how Access is to treat it. You know that fields possess properties, both in tables and queries. Objects you place on a form can also have properties. The exact properties available depend on the object you have selected.
In general, properties describe attributes of an object. For instance, the height, width, and position of an object are all attributes. So are things like colors and font. As you worked through the previous section, you set properties for various objects, although you may not have been aware of it.
Changing Object Properties
You can view and change an object's attributes by either of these two methods:
- Double-click your mouse on the object.
- Select the object and click your mouse on the Properties tool on the toolbar.
When you do either of these things, Access displays the Properties dialog box for that object. For example, Figure 9-20 shows the Properties dialog box for the first Label object you placed in the form (the one used for the heading of the form).
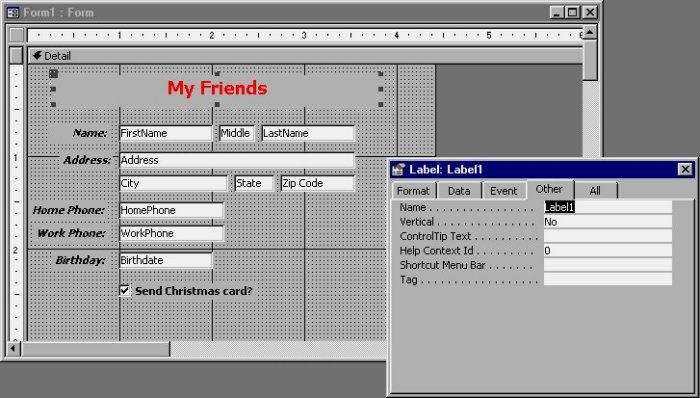
Figure 9-20 The Properties dialog box.
In all, there are 38 properties for this one object. For some objects, there may be more properties; for some, there may be less. The number is not particularly important, but it is important to know how to change a property.
To change a property, first display the Properties dialog box. Next, use the mouse to select the property category from the tabs in the dialog box. You can then use the mouse to select the property you want to change. You can either type in a new value or (if it is available) use a pull-down arrow or builder to select an appropriate value. When you change a property, the effect is immediate.
Note: When changing some properties, it is easier not to use the Properties dialog box. For instance, it is much easier to use the toolbar to change colors. If you can, use a different method of changing properties whenever one is available.
Since there are so many different properties available, you may begin to wonder what a particular property is used for. The easiest way to find out is to select the property and then look at the Access status bar. There you will find information that provides quick help on what the property does. If you need additional help, you can use the regular Access online Help system. The Help system thoroughly describes the purpose and use of various properties.
As an example of how to change properties, select the Check Box object you placed on the form at the end of the previous section. Notice that the properties in the Properties dialog box change to reflect the new object you have selected. When you select the Other tab in the dialog box, it should appear as shown in Figure 9-21.
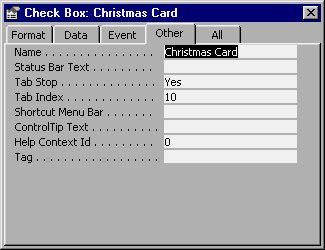
Figure 9-21 The Properties dialog box.
A helpful property you can change is the Status Bar Text property. This is the property that specifies what Access should display on the status bar when the Christmas Card control is selected. All you need to do is choose the Status Bar Text property and start typing the text you want displayed. For this example, type the text Should this person receive a Christmas card? When you are done with the Properties dialog box, go ahead and close it.
Note: Many of the properties for form objects are the same as properties for other Access items, such as fields. You may want to refer to Chapter 3, "Taking a Closer Look," for more information about some properties.
Changing Form Properties
Your form (the entire thing) also has properties. You can view these properties by selecting the form. To select a form, click your mouse on the small gray block just to the left of the horizontal ruler at the top of the form Detail window. If the Properties dialog box is open, you will see the properties for the entire form. There are 81 properties applicable to forms, and Access sets many of them automatically when you edit your form. You changed one of the form properties earlier in the chapter when you changed the Record Source property for the form.
Many properties are useful only for advanced programming. However, you can use some of them immediately. For example, you may want to change the wording that appears in the title bar for your form. By default, the title bar will display the word "Form" followed by a colon and the name of the form. However, since you are working with the table that contains all your friends, you might want the title bar to display your name.
To make this change, simply modify the Caption property for the form. Whatever you put in the Caption property will appear in the form's title bar. When I changed the Caption property to my name, Access changed the title bar of the form, as shown in Figure 9-22.

Figure 9-22 Properties control many appearance items.
Note: Access does not change the title bar until you actually open the form. If you are using the Design window, the form uses the default title bar.
Saving Your Form
When you are done creating or changing a form, you need to save it. Access automatically gives you the chance to do this when you close the form Design window. If you have made changes to the form (or if you are designing the form for the first time), Access will ask if you want to save your changes. The effect of clicking your mouse on the Yes button varies, depending on whether you are editing or creating a form. If you are editing, Access saves your changes under the same form name as you used previously. If you are creating a form, Access will ask you to provide a form name, as shown in Figure 9-23.
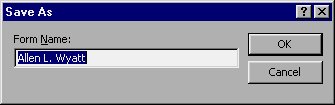
Figure 9-23 You can specify a name for your form.
In this instance, Access suggests a name based on the caption I supplied for the form. (You remember; this was set when changing the form properties.) This name can be changed in any way desired. You should use a name that represents the purpose of the form. In this case I changed the form name to Reviewing Friends. When you press ENTER, Access saves the form and returns you to the Database window.
Note: Access saves forms with your database in the same way that it saves other database objects. Forms are an integral part of the database; they are not saved in a separate file. You can see what forms are available with a database by clicking your mouse on the Form button in the Database window.
Learn Access Now! Chapter 8 Previous Section in Chapter 9 Next Section in Chapter 9 Chapter 10