Learn Access Now! Chapter 8 Previous Section in Chapter 9 Next Section in Chapter 9 Chapter 10
Chapter 9: Creating Custom Forms
(This is section 2 of 4 in this chapter)
Creating a Form Using the Form Wizards
Note: This section uses the Customer database you have used in several chapters of this book, most recently in Chapter 8, "Creating Simple Reports." If you do not have that database available, you may want to use the Customer 3.mdb database located on the CD-ROM. You should copy the file to a directory on your hard drive and rename it Customer.mdb.
As with may other database objects, Access provides Form Wizards you can use to create your forms. To see the full range of the Form Wizards available, choose the Form option from the Insert menu. Access displays the New Form dialog box, shown in Figure 9-2.
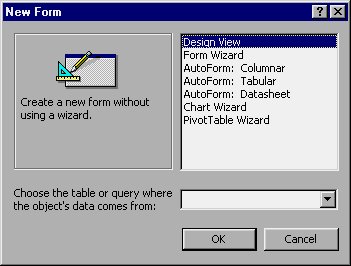
Figure 9-2 The New Form dialog box.
This dialog box should look very familiar. You have used the same sort of dialog box to create both queries and reports. Your first task is to use the pull-down list at the bottom of the dialog box to select a table or query whose data you want to use for the form. You should select the Business Customers table.
At the top of the dialog box are seven choices which define the different resources you can use to create a new form. The choices are as follows:
- Design View. Allows you to create a report using the report Design window. This is discussed in more detail later in this chapter.
- Form Wizard. Creates a form using the basic Form Wizard. This is the same Wizard you access if you double-click your mouse on the Create Form By Using Wizard option in the Forms area of the Database window.
- AutoForm: Columnar. The form displays all the fields in your table in a single column, with the field's Caption property to the left of the field.
- AutoForm: Tabular. The form displays all the fields in your table horizontally, with each record occupying a single row.
- AutoForm: Datasheet. The form looks very similar to the Datasheet view of the table or query.
- Chart Wizard. The form displays a graph based on your table data.
- PivotTable Wizard. Access creates a form that includes a PivotTable. These may be familiar to users of Excel; they allow information to be viewed in a condensed form that is helpful for some types of data analysis.
The only basic difference between these forms is the layout of the information within the form. There is no intrinsic difference in what the forms do or how they do it. In the following sections, you will learn how to use the Form Wizards to create several of these types of forms.
Creating a Basic Form
To create a basic form, make sure you select the Form Wizard option from the New Form dialog box, and then click your mouse on the OK button. (You can also double-click your mouse on the Create Form By Using Wizard option in the Forms section of the Database window.) Access displays the Form Wizard dialog box, shown in Figure 9-3.

Figure 9-3 The Form Wizards dialog box.
Notice that the dialog box includes the Business Customers table as the data source for your form. (Remember; you should have selected this in the New Form dialog box.) At the bottom left side of the dialog box you can see the different fields available in the data source. All you need to do is select which ones you want included in your form, and use the controls to the right of the list to transfer them to the Selected Fields area.
For example, let's say you want to create a data input form that can be used when setting up a new account. There are only a few fields that are necessary for this type of form. You should, in turn, select each of the fields except Account Number (this is assigned automatically), Account Opened (that is today), Credit Limit (you want that set by a different department), Last Order (there are no orders yet), and Active (this should be set automatically).
Select the desired fields, and then click your mouse on the > button. The field names appear in the right side of the dialog box. When you are done, the dialog box should appear as shown in Figure 9-4.
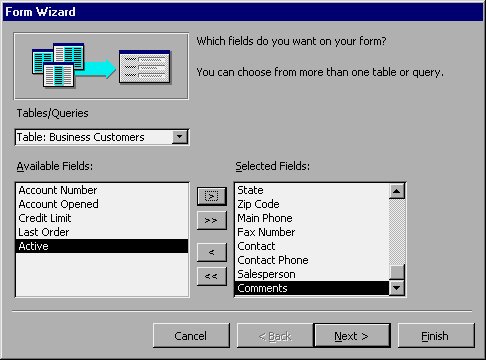
Figure 9-4 After selecting a few fields.
When you are ready to proceed, click your mouse on the Next button. Access displays the dialog box shown in Figure 9-5.
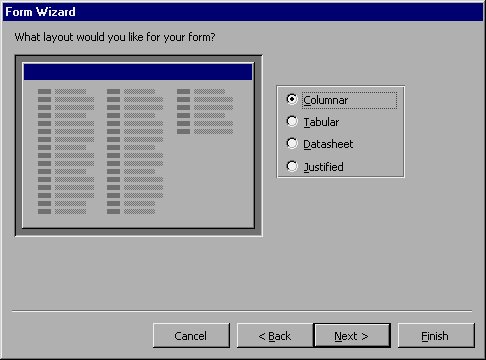
Figure 9-5 Selecting a layout.
Here you are presented with four different layouts from which you can choose. The Columnar, Tabular, and Datasheet layouts are essentially the same as what you can create with the third, fourth, and fifth options in the New Form dialog box (see Figure 9-2). As you select the option button associated with each type of layout, notice that the preview of the form changes. This gives you a general idea of how your form will appear. For this example, make sure the Columnar option is selected. You can then click your mouse on the Next button. Access displays the next step in the Wizard, as shown in Figure 9-6.
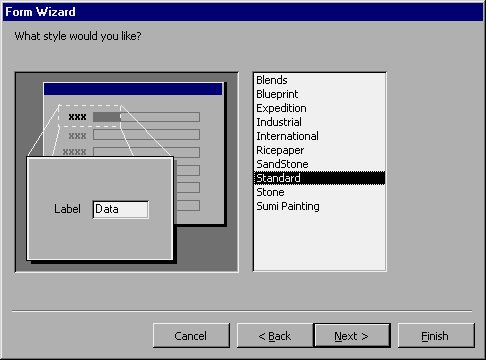
Figure 9-6 Selecting a form style.
Here you have the option of selecting from any of ten different form styles. As you select each style, you can see what the effect is in the dialog box. The styles offer quite a bit of variety in data presentation, which reflects the wide range of data that can be represented in Access. Since this is business data we are working with (the Business Customers table), select the very conservative Standard style. You can then click your mouse on the Next button. The Form Wizard displays the final dialog box, as shown in Figure 9-7.
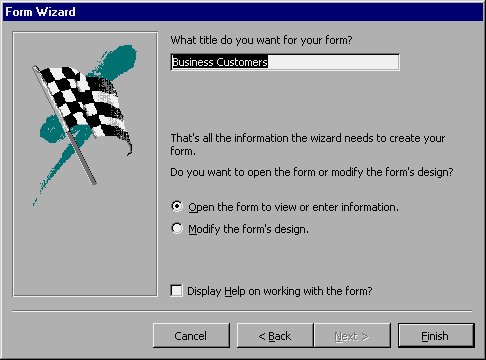
Figure 9-7 Finishing up your form.
That's basically all there is to creating your basic form. All you need to do now is provide a form title. This title will appear at the top of the form itself, and it is used to save the form definition in the database. Since the default form suggestion is acceptable, click your mouse on the Finish button. The Wizard creates the form according to your specifications and then displays it on the screen. Figure 9-8 shows what this form looks like.

Figure 9-8 Your completed form.
You will find an input form such as this much friendlier than a Datasheet. At the top of the form, in the form's title bar, is the title you specified. At the bottom of the form is the control area where you can navigate from record to record in the table. You can either review and edit existing records, or you can go to the end of the file and add new records.
Note: Form Wizards don't always do the best job creating forms. For instance, notice in Figure 9-8 that the phone number fields are too small, resulting in phone numbers that are cut off. For this reason, many people use the Wizards to create a "starting point" for forms. They can then fine tune them to meet their specific needs. Later in this chapter you learn how to create a form from scratch. The same techniques are used to edit a form you previously created and saved.
Creating an AutoForm Form
If you examine the New Form dialog box (Figure 9-2), you can see that Access allows you to create three types of AutoForms: Columnar, Tabular, and Datasheet. AutoForms (regardless of the version) are the simplest type of form you can create. The Wizard makes all the decisions for you; all you need to do is specify a table or query to use as the source of data used in the form.
As an example of how to use an AutoForm Wizard, display the New Form dialog box. Make sure that Business Customers is selected as the data source (at the bottom of the dialog box). Then select the AutoForm: Tabular option and click your mouse on the OK button. The Wizard, in turn, creates a form that includes all your table fields in tabular format. You don't get the opportunity to select any formats, styles, fields, or other items that may affect how the form appears. Figure 9-9 shows an example of the form created by the AutoForm: Tabular Wizard.
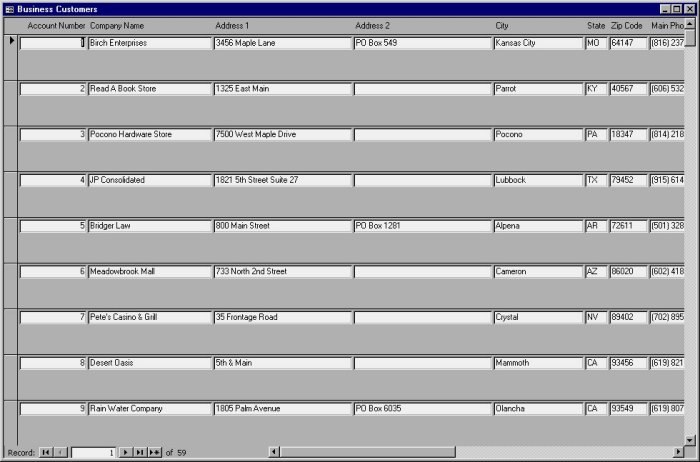
Figure 9-9 A completed AutoForm.
When you are through working with the form, you can close it. Access asks you if you want to save the form. If you click your mouse on Yes, you are given the opportunity to provide a name for the form. Provide a name, such as AutoForm Example, and click your mouse on the OK button. Access will save the form and update the Database window.
Learn Access Now! Chapter 8 Previous Section in Chapter 9 Next Section in Chapter 9 Chapter 10