Learn Access Now! Chapter 1 Next Section in Chapter 2 Chapter 3
Chapter 2: Access in an Hour
(This is section 1 of 7 in this chapter)
Access is a powerful, flexible, easy-to-use, database-management program. In this chapter, you will start to tap into Access capabilities. Although the title of this chapter, "Access in an Hour," is an overworked phrase, you really will learn quickly how to use Access. Granted, an hour won't be enough time to master the advanced features. But it will be enough time for you to learn the basics behind the program and to create your own database that you can put to immediate use.
By the time you finish this chapter, you will understand the following key concepts:
- How to create a database
- What to name your database and where to store it
- How to create a table using the Table Wizard
- What types of tables you can create with the Table Wizard
- How to pick a name for your table
- What a primary key is and how to choose one
- How to enter information into your new table
- How to close the Datasheet
- How to change and delete information in the table
- When your information is really saved
Creating Your Own Database
To create your own database, you can use any of three methods:
- Click your mouse on the New tool (it is the leftmost tool on the toolbar; it looks like a blank sheet of paper).
- Choose New Database from the File menu.
- Press CTRL+N.
Regardless of which method you choose, you will see the New dialog box shown in Figure 2-1.
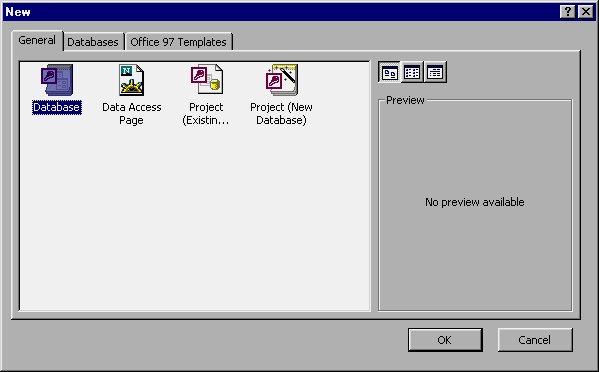
Figure 2-1 The New dialog box.
The New dialog box allows you to specify how you want to create your new database. There are many choices on the General tab (Figure 2-1) and the other two tabs in the dialog box. The choices provide different ways to accomplish the same ends. The selection you make in the New dialog box serves as the starting point, or template, for a new Access database.
For the purposes of this discussion, simply make sure the default Database object is selected, as shown in Figure 2-1. Then click your mouse on the OK button. Access displays the File New Database dialog box, as shown in Figure 2-2.
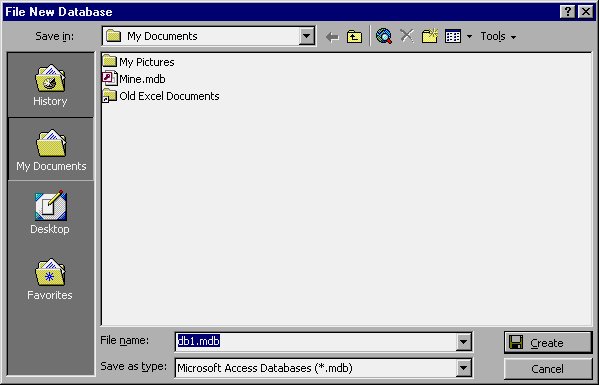
Figure 2-2 The File New Database dialog box.
The File New Database dialog box should look familiar. It is very similar to the Open Database dialog box you learned about in Chapter 1, "Getting Started with Access." It is also similar to dialog boxes that you use to create files in other Windows programs. To use the File New Database dialog box, just specify the name you want to use for your database and where you want to store the database on disk.
Choosing a Database Name
You can name your database anything you want, but the filename must follow the same conventions you would use for any disk filename. Do not include a filename extension (the part of the filename to the right of the period); Access will provide the file extension based on its rules.
Notice that the File New Database dialog box lists all the database files in the current directory. If you want to replace an existing database, all you need to do is provide the name of that database. To do this, type in the name or use the mouse to select it from the filename list.
In general, you should choose a database name that is as descriptive as possible. For example, if you were creating a database about your gem collection, you might name it "Gems" or "My Gem Collection." In this chapter, you will create a database that will contain the names, addresses, and phone numbers of all your friends. Thus, "My Friends" is an appropriate name for this database. Type the words My Friends in, but don't press ENTER quite yet.
Where Should You Store Your Database?
In the New Database dialog box, you also can specify where you want to store your database. Access lets you store database files virtually anywhere you desire. You can specify any drive, path, or network location to which you have access. You may want to use a special directory for your database files. For instance, you may want to put all your work-related databases in one directory and all your personal databases in another directory. If this is the case, you should save the My Friends database in your personal database directory.
After you specify your database name and location, click your mouse on the Create button. Access creates the new database, using the name you provided, and displays the Database window shown in Figure 2-3. Notice that the name of your database is shown at the top of the Database window.
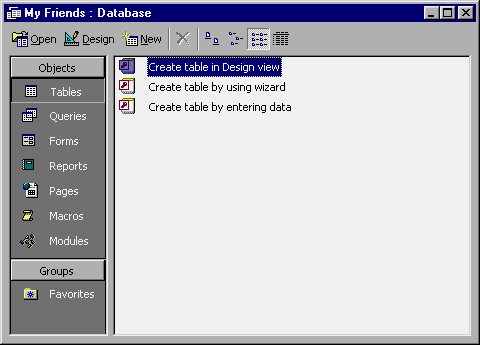
Figure 2-3 The Database window for your new database.
As you will recall from Chapter 1, Access stores your data in tables. Since this Database window is for a brand new database, there are no tables listed. In the following section, you will learn how to create a table.
Learn Access Now! Chapter 1 Next Section in Chapter 2 Chapter 3