Learn Access Now! Chapter 2 Next Section in Chapter 3 Chapter 4
Chapter 3: Taking a Closer Look
(This is section 1 of 3 in this chapter)
In the previous chapter, you learned how to create both a database and a table, as well as how to enter and edit information in the table. In this chapter, you will build on the foundation laid in Chapter 2.
By the time you finish this chapter, you will understand the following key concepts:
- How to change an existing table's structure
- The data types that Access supports
- Why you should add comments to your table design
- What field properties are and how you can change them
- How to perform editing functions on entire tables
Modifying Your Table Design
In Chapter 2, you learned about the Design view, which lets you examine your table's structure without looking at the information it contains. For now, open the My Friends database you created in Chapter 2.
To look at your table's structure (or design), select the table name from the Database window and then click your mouse on the Design button. Access, in turn, will display the Design view window shown in Figure 3-1.
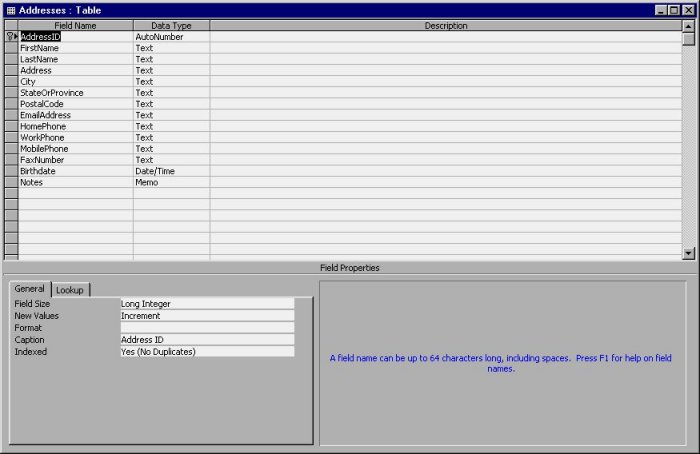
Figure 3-1 The Design view window for the My Friends table.
Note: The number and types of fields shown in your Design window may vary from those shown in Figure 3-1. Your fields will depend on how you answered the Table Wizard questions in Chapter 2.
Using Design view, you can change your table's layout. You can add or edit fields, change the type of information stored in a field, add comments to your layout, and modify the properties of a field. The following sections examine each of these operations.
Adding and Editing Fields
In most ways, the Design view window operates like the Datasheet window. Access lets you add fields, move fields, or change field names without affecting the information contained in your current fields. To add a field, select the first blank row in the layout (this is the last row) or insert a row. To insert a row, select the field before which you want to insert the new field. Then choose the Insert Row option from the Edit menu or click your mouse on the Insert Row tool. When you insert a new field, Access moves all the subsequent fields down and inserts an empty field in the layout.
For instance, assume that you want to add a field for the middle initial of your friends. Naturally, you would place this field between the first name and last name fields. To add the field, perform the following steps:
- Select the third row of the layout and make it the current row. (This is the row that defines the LastName field.)
- Click your mouse on the Insert Row tool. This adds a blank row between FirstName and LastName, as shown in Figure 3-2.
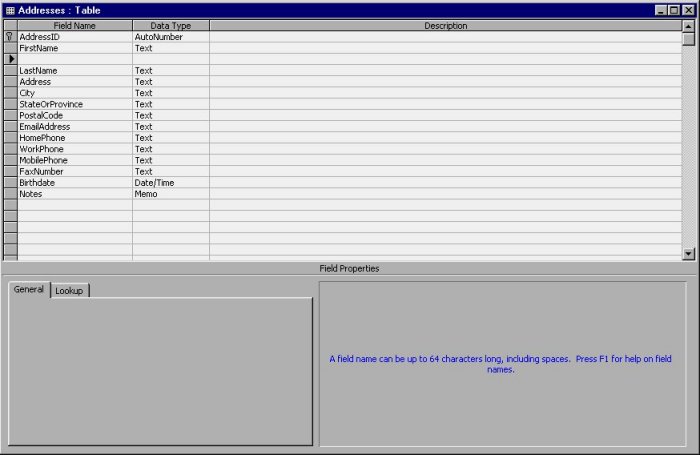
Figure 3-2 Inserting a blank row in your table layout.
Now you can enter the new field name. In this case, type Middle Initial (you can include the space). That's all there is to adding a field. In the next section, you will learn how you can specify the type of information (text, numbers, and so on) that the new field will contain.
As you work with table fields, there may be times when you want to move a field. To move a field, select the field's row (make sure the entire row is highlighted) and then move the mouse point to the current record indicator at the left side of the record. (The current record indicator is the small triangle to the left of the record.) When you hold down the left mouse button, you can drag the field to any new position you desire. When you release the mouse button, Access moves the field to the new location. Moving a field does not harm or modify its data, nor does it change the data within any surrounding fields.
Your field names should describe the data that your fields contain. Over time, the information you store in a table may change. To change the name of an existing field, simply select the name and edit it. For instance, if you want to change the name of the PostalCode field to Zip Code, select the existing field name and type in Zip Code. Likewise, you may want to change the name of the StateOrProvince field to simply State. The resulting changes to your table structure (after adding the Middle Initial field and changing the StateOrProvince and PostalCode field names) are shown in Figure 3-3.
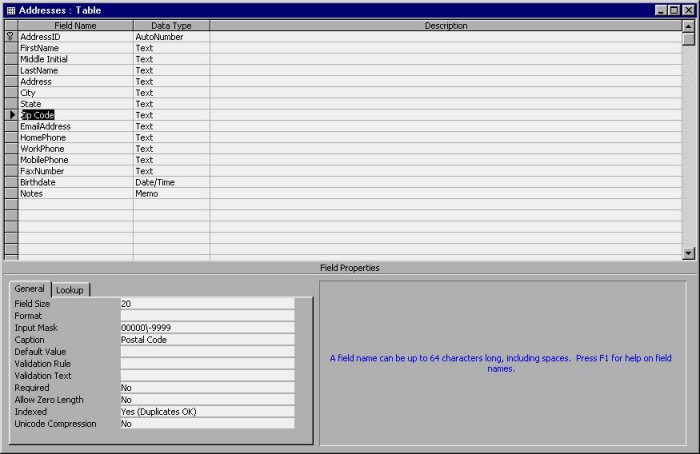
Figure 3-3 The modified table structure.
Over time, you may no longer need to track specific data. As such, Access also lets you delete fields. You delete a field in much the same way you would delete records in a table:
- Using your mouse, select the entire row containing the field you want to delete.
- Press the DEL key or choose the Delete option from the Edit menu. If you are deleting a field that contains data, Access will ask you to confirm the deletion, as shown in Figure 3-4.

Figure 3-4 Access asks you to confirm the deletion.
Note: If you delete a field by mistake, immediately use the Edit menu Undo option. If you make any other changes to your table structure, the deleted field (and its contents) cannot be recovered.
Changing the Information Type
In order to store a piece of information efficiently, Access needs to know its data type. The data type specifies the type of information the field will contain. Access lets you specify nine different data types, as detailed in Table 3-1.
| Data Type | Meaning | |
|---|---|---|
| AutoNumber | A sequential number Access fills in automatically as you add records. | |
| Currency | A number accurate to 15 decimal places to the left of the decimal point and 4 places to the right. | |
| Date/Time | A number representing any date or time between the year 100 and 9999. | |
| Hyperlink | An active link to another document, URL, or location within a document. | |
| Memo | A long text string, up to 64,000 characters. | |
| Number | A numeric value. | |
| OLE Object | Objects such as sound clips or graphical images. (OLE is a technical term for Object Linking and Embedding, which you learn more about in Chapter 17, "Using OLE.") | |
| Text | Any characters, up to a length of 255 characters. | |
| Yes/No | A yes or no value. |
Table 3-1 Data types supported by Access.
If you have been working with computers long, you may already be familiar with some of the data types listed in Table 3-1. These basic data types cover virtually every category of information you could electronically store.
In the Data Type column of the Design view window, Access displays the current data type of each of your fields. If you want to change data types, select the data type entry for the field you want to change.
For instance, assume you added a field called Christmas Card to your layout. The purpose of the field is to indicate whether this person is on your Christmas card list. This field is a great candidate for a Yes/No data type, but Access automatically sets the data type to text. As such, you must explicitly change it to a different data type.
To do this, select the Data Type column for the Christmas Card row. You will notice a small arrow appears to the right side of the data type. If you click your mouse on the arrow, a drop-down list of available data types appears. All you need to do is select one of the data types. In this case, select Yes/No. When you leave Design view, Access converts any values in the field.
Note: Changing data types can be a time consuming process, depending on how many records there are in your table. When you change a data type, Access tries to convert any existing data in the field into the new data type. If it cannot make a conversion (for instance, to or from an OLE Object), you will lose the data previously stored in the field.
Adding Layout Comments
When you design a table, you decide which fields the table will store, as well as each field's data type. To help you explain your decision to others who may eventually need to update the table, Access lets you place comments about each field in the table. By reading your comments, you or another user quickly knows why specific choices were made.
In Design view, you can place comments about your fields in the third column of each row. The contents of the description field do not affect any Access operations; the description field is simply a place where you document your thoughts or provide comments of a field's purpose. Sometime in the future, you may forget exactly why you included a particular field in your table. If you include a comment now, you are less likely to forget later.
To add a comment, simply select the cell in the third column of the row that should contain the comment. You can then type anything, up to 283 characters in length. In Chapter 9, "Creating Custom Forms," you will learn how this description field can come in handy.
Understanding Properties
You probably noticed the area at the bottom of the Design window; this is the Field Properties area. Properties are simply characteristics associated with a field or an object. The Design window lets you change the properties associated with fields.
The types of properties associated with a field depend on the field's data type. For instance, a text field has a Length property (also known as a Field Size property) which controls the number of characters the field can hold. An OLE Object (such as a sound or a picture), on the other hand, does not have such a property simply because a length would not make sense.
To change a field's property, select the row that contains the field and then select or type the new property. Although many of the properties are self explanatory, some are not. The following sections explain the latter properties.
Note: Changing some properties can result in a loss of data. For instance, if you shorten the length of a text field, then any fields that contain longer values will be truncated. In instances where you may lose data, Access will first warn you before it carries out the change.
Caption
A Caption is a label Access uses to refer to a field. In Datasheet view, the Caption appears above the field's column. Access also uses the Caption property in other places, such as in labels for controls. (You will learn more about controls in Chapter 9.)
The Caption property can be up to 255 characters. If you don't provide a Caption, Access uses the field name instead.
Format
The Format property describes the format Access uses for displaying a value in the field. The Format property only affects how Access displays data. The Format property does not change the actual value stored in your table. You can set different formats for different data types. For example, Access provides several different formats that control how a date is displayed. Likewise, for currency fields, you can display monetary values based on several different formats.
To see the available formats for a particular field, select the Format property and then click your mouse on the arrow that appears to the right of the property box. For instance, if you select the Birthdate field (which is a Date/Time data type), and then click your mouse on the Format property, an arrow will appear to the right of the property box. If you click your mouse on the arrow, you will see a drop-down list of the available formats for the field. The format name is shown to the left of the drop-down list, while an example of the format's use is shown to the right.
If a pre-defined format does not meet your needs, you can create your own custom formats. You can create a custom format by putting together a series of characters that specify how the values in the field should appear. The formatting characters you use will depend on the data type of the field: Numeric or Currency, Date/Time, Yes/No, or Text or Memo.
The formatting codes for Numeric or Currency data types are shown in Table 3-2.
| Character | Meaning | |
|---|---|---|
| 0 | Provides a place holder for a digit. Access displays either a digit or a zero. | |
| # | Provides a place holder for a digit. Access displays either a digit or a space. | |
| . | Decimal point. | |
| , | Thousand separator. | |
| E-, E+, e-, e+ | Scientific notation. | |
| % | Number is a percentage and is scaled by 100. | |
| \ | Display the next character as a literal. | |
| -, +, $, (, ) | Display as a literal character. | |
| * | Use the following character as the fill character (for filling empty spaces in the format). |
Table 3-2 Custom formatting codes for Numeric or Currency data types.
For example, if you wanted to develop a custom format for currency so that the numbers 1234.5678 and -1234.5678 appeared as the following:
*******$1,234.57
(*******$1,234.57)
you would use the following in the Format property:
**$#,##0.00;(**$#,##0.00)
Notice that there are actually two formats specified, separated by a semicolon. Access uses the format to the left of the semicolon if the value in the field is positive and the format to the right if the value is negative.
Table 3-3 details the custom formatting codes you can use for fields with a Date/Time data type.
| Character | Meaning | |
|---|---|---|
| : | Time separator. | |
| / | Date separator. | |
| d | Display the day as a number without a leading zero. | |
| dd | Display the day as a number with a leading zero. | |
| ddd | Display the day as three text characters (Sun, Mon, Tue, and so on). | |
| dddd | Spell out the full name of the day (Sunday, Monday, Tuesday, and so on). | |
| ddddd | Use the short date setting from Windows Control Panel to display the full date (default is m/d/y). | |
| dddddd | Use the long date setting from Windows Control Panel to display the full date (default is mmmm dd, yyyy). | |
| w | Display the day of the week as a number. | |
| ww | Display the week of the year as a number. | |
| m | Display the month as a number without a leading zero. | |
| mm | Display the month as a number with a leading zero. | |
| mmm | Display the month as three text characters (Jan, Feb, Mar, and so on). | |
| mmmm | Spell out the full name of the month (January, February, March, and so on). | |
| q | Display the numeric quarter of the year. | |
| y | Display the year as a number. | |
| yy | Display the year as two digits. | |
| yyyy | Display the year as four digits. | |
| h | Display the hour as a number without a leading zero. | |
| hh | Display the hour as a number with a leading zero. | |
| n | Display the minute as a number without a leading zero. | |
| nn | Display the minute as a number with a leading zero. | |
| s | Display the second as a number without a leading zero. | |
| ss | Display the second as a number with a leading zero. | |
| tttt | Display the full time using the time format specified in the Windows Control Panel. | |
| AM/PM | Use a 12-hour clock and display the time with the suffix AM or PM, as appropriate. | |
| am/pm | Use a 12-hour clock and display the time with the suffix am or pm, as appropriate. | |
| A/P | Use a 12-hour clock and display the time with the suffix A or P, as appropriate. | |
| a/p | Use a 12-hour clock and display the time with the suffix a or p, as appropriate. |
Table 3-3 Custom formatting codes for the Date/Time data type.
In most instances, the formats Access provides for the Date/Time data type will meet your needs. However, you may need to use a special format to fulfill a unique need, such as displaying the quarter of the year. For instance, suppose you wanted the dates 6/11/1999 and 1/15/2000 to appear as follows:
Quarter 2, 1999
Quarter 1, 2000
In this case, you would use the following in the Format property:
"Quarter "q", "yyyy
Table 3-4 shows the custom formatting codes you can use when working with fields that have the Text or Memo data type.
| Character | Meaning | |
|---|---|---|
| @ | Character required (either text from string or a space). | |
| & | Text character not required | |
| < | Force all characters to lowercase | |
| > | Force all characters to uppercase |
Table 3-4 Custom formatting codes for the Text or Memo data types.
When you compare them to other formatting characters, the custom text formatting characters are fairly easy to use. As an example, assume you want to format a value so it appears all in uppercase and so that three question marks appear if the field is empty. In this case, you would use the following Format property:
>;???
The code to the left of the semicolon specifies the formatting Access will apply to a text value. The code to the right directs Access to display question marks if there is no text value. The result of this Format property might appear as follows:
???
WIDGET
???
COG
???
You can also create a custom Format property for the Yes/No data type. Access internally stores this data type as one of two values: -1 for Yes and 0 for No. A custom Format property for this data type has three parts, each separated by a semicolon. Access does not use the first part, which is left blank (apparently for future versions of Access). Access uses the second part if the value is -1 and the third part if the value is 0. For example, take a look at the following Format property:
;"Left";"Right"
This Format property results in the text Left and Right being used instead of Yes and No. The text you use in your custom format is entirely up to you. You should note that when you are entering data for this field in the Datasheet, you still work with it as a check box; if the check box is selected, then Access translates that to Left. If it is not selected, it translates to Right.
Note: Remember that the Format property only affects how Access displays information; it does not modify the underlying values in the table.
Input Mask
Some data types let you specify an Input Mask property. An input mask guides users as they enter data. Perhaps one of the most common examples is when you enter a phone number. If you use an input mask, you might see something like this:
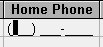
Notice that the parentheses are already in place for the area code and a dash appears in the proper place for the phone number itself. All the user has to do is type numbers. You specify this sort of Input Mask property as follows:
!\(999") "000\-0000
You could probably tell from this example that you construct input masks in much the same way as format specifications (as covered in the previous section). In other words, you specify a series of characters that tells Access the way the mask should appear. Table 3-5 indicates the various characters you can use in the Input Mask property.
| Character | Meaning | |
|---|---|---|
| 0 | Digit placeholder (entry required; plus and minus signs are not allowed). | |
| 9 | Digit placeholder (entry not required; empty positions converted to spaces; plus and minus signs are not allowed). | |
| # | Digit placeholder (entry not required; empty positions converted to spaces, plus and minus signs are allowed). | |
| L | Letter placeholder (entry required). | |
| ? | Letter placeholder (entry optional). | |
| A | Letter or digit placeholder (entry required). | |
| a | Letter or digit placeholder (entry optional). | |
| & | Placeholder for any character or a space (entry required). | |
| C | Placeholder for any character or a space (entry optional). | |
| . | Decimal point. | |
| , | Thousand separator. | |
| / or - | Date separator. | |
| : | Time separator. | |
| < | Force all following characters to lowercase. | |
| > | Force all following characters to uppercase. | |
| ! | Fill input mask from right to left instead of left to right. | |
| \ | Display the next character as a literal. |
Table 3-5 Characters you can use in the Input Mask property.
Note: If you only need to put together a simple input mask, or you want to use a common one (such as a phone number, social security number, or zip code), you can use the Input Mask Wizard. You access this Wizard by clicking your mouse on the Builder button that appears at the right side of the Input Mask property box when the box is selected.
Validation Rule and Validation Text
As you have learned, input masks control the format with which users enter data. In addition to letting you specify how users enter data, Access also lets you specify the acceptable values for a field. You can do this by constructing validation rules.
Validation rules, if you apply them properly, can be very powerful tools. They let you check a user's input as it is received into the field. For example, you can use a validation rule to make sure that a value is greater than 0 or greater than 100. You could use a different rule to ensure a value falls within a certain range. You construct validation rules like an equation. You use operators such as those shown in Table 3-6 to compare the field value and some other value.
Note: Putting together validation rules may seem much like programming. There are many similarities. If you have no programming experience, and you feel that constructing validation rules is a bit over your head, don't worry--entire chapters could be written about putting expressions together. You can use Access successfully without ever putting together a validation rule. After you become more familiar with Access, and perhaps after you have worked through the latter chapters of this book (which cover programming topics), you may want to revisit this section and give validation rules another try.
| Switch | Meaning | |
|---|---|---|
| + | Addition | |
| - | Subtraction | |
| / | Division | |
| * | Multiplication | |
| Mod | Modulus division (remainder) | |
| \ | Integer division (whole numbers) | |
| ^ | Exponentiation | |
| = | Equal | |
| < | Less than | |
| > | Greater than | |
| <= | Less than or equal | |
| >= | Greater than or equal | |
| <> | Not equal | |
| Between | Between two values | |
| And | Logical And | |
| Eqv | Logical Equivalence | |
| Imp | Logical Implication | |
| Not | Logical negation | |
| Or | Logical Or | |
| Xor | Logical Exclusive Or |
Table 3-6 Operators you can use in making validation rules.
As an example, assume you want to check if a value being entered by a user is between 10 and 20. You can do this by typing the following equation in your Validation Rule property:
Between 10 And 20
The Validation Text property is the message displayed by Access if a value does not meet your validation rule. In other words, if your validation rule checks whether a value is outside a certain range, and the value is outside that range, Access displays the validation text in a dialog box. As an example, let's assume that the following are your settings for the Validation Rule and Validation Text properties:

In this case, if you tried to enter a value lower than 20 in the field, then Access would display an error message dialog box, as shown in Figure 3-5.
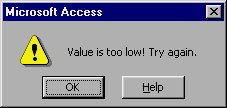
Figure 3-5 A validation rule error message dialog box.
Note: Some people like to use the Access Expression Builder to create validation rules. While it can be helpful in some instances (such as if you are creating a very complex expression), for most purposes it is more trouble than just entering an validation rule directly. If you decide you want to try out the Expression Builder to put together a validation rule, simply click your mouse on the Builder button at the right side of the Validation Rule property box. This button is visible when you select the Validation Rule property box.
Learn Access Now! Chapter 2 Next Section in Chapter 3 Chapter 4