Learn Access Now! Chapter 4 Previous Section in Chapter 5 Next Section in Chapter 5 Chapter 6
Chapter 5: Sorting and Filtering Information
(This is section 2 of 3 in this chapter)
Filtering Your Data
In the previous section, you learned how to use the Filter window to create complex sorts. You can also use the Filter window to create filters. A filter lets you limit the records you view. Filtering does not remove records; it only lets you specify which records you want Access to display.
When you define a filter, you specify criteria that data must meet before Access will display it. For example, one filter might list records for employees that live in New York.
Access displays only those records that meet your filter criteria. In effect, you create a subset of your data. You can then work with that subset as if it were a table: you can add records, delete records, and make any changes you desire. Access updates the original table to reflect each change you make.
You use filters to make your data more manageable. As an example, assume you were working with a list of your customers, and you replaced one of your sales representatives. Now you must update the customers table to reflect the new sales rep.
You could use the Replace function (described in Chapter 2, "Access in an Hour"), but you may instead want to create a filter so you can review customers before you actually reassign them. In this case, your filter would limit the records Access displays to only the records for the old sales rep. In most cases, it is much easier to work with this smaller set of records than with the entire customer table.
Creating a Filter
To create a filter, you again need to work with the Filter window. Click your mouse on the Filter option on the Records menu, and then choose Advanced Filter/Sort from the resulting submenu. Access displays the Filter window, shown in Figure 5-5.
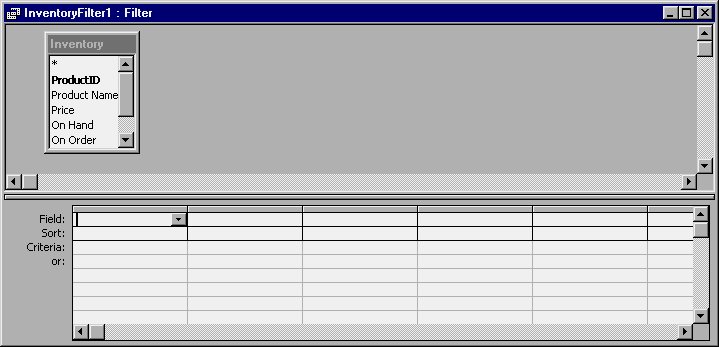
Figure 5-5 The Filter window.
To create a filter, all you need to do is pick a field and specify the criteria you want applied to the field. If you desire, you can also specify how you want the field sorted. (Thus, you can both filter and sort at the same time.)
As an example, assume you have a table that contains your inventory records, similar to the table shown in Figure 5-5. In this table, one of the fields is named Supplier. You use this field to keep track of who supplies a particular item. Assume you need to look at which items are supplied by Allied Industries. Using a filter, you can restrict the records Access displays to only those records for which the supplier is Allied Industries. To create such a filter, you would follow these steps:
- Choose the Filter option on the Records menu, and then choose Advanced Filter/Sort from the resulting submenu.
- In the first column of the grid at the bottom of the window, choose Supplier as the Field.
- In the Criteria cell for the column, enter an equal sign, followed by the words Allied Industries. When you press ENTER, the Filter window should appear as shown in Figure 5-6. (Note that Access adds the quotation marks around the supplier name automatically.)
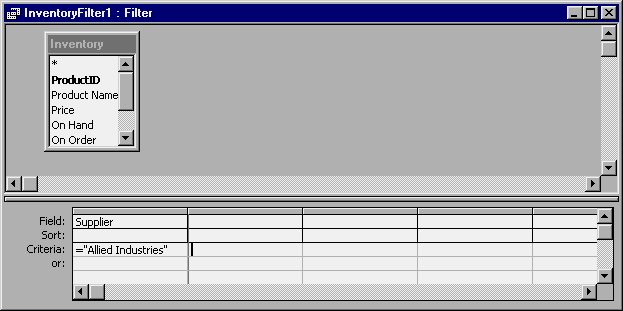
Figure 5-6 Creating a simple filter.
Access applies your selection rules (as defined by the filter) and displays only those records for Allied Industries. The resulting subset of your inventory table is much easier to work with than the entire table. In this case, your filter instructs Access to examine each record in the table and to display only those records for which the Supplier field contains (is equal to and hence the equal sign) the name Allied Industries.
Note: The filters you create can be as simple or as complex as you desire. You specify criteria for your filter using the same regular expressions you used to create validation rules for your fields (Validation rules were discussed fully in Chapter 3, "Taking a Closer Look".) If you need help remembering the expressions you can use, refer back to the section on validation rules.
Removing a Filter
It is not uncommon to use a filter to quickly view your data in a particular way, and then want to remove the filter to view all your records. Access makes this very easy, and you can accomplish this task using either of two different methods.
The first (and perhaps easiest) method involves the toolbar. When a filter is active, the toolbar contains a tool that looks like a funnel. Actually, there are three tools that contain funnels, but one tool that contains just a funnel, without any adornment. This tool looks like it is selected. If you position the mouse pointer over the tool, you will see that its name is Remove Filter. Click on the Remove Filter tool, and all your records again appear; the filter is completely removed.
The other method of removing a filter is to use the menus. On the Records menu is an option entitled Remove Filter/Sort. If you choose this option, all your records are again displayed.
Saving a Filter
Access only retains your filter until you leave your table. Thus, if you close your table and later decide you want to use the filter again, you will need to create the filter again from scratch. This can be both frustrating and time consuming.
To get around this problem, you can save a filter as a query. You will learn all about queries in Chapter 6, "Using Queries to Examine Your Data." Filters are closely related to queries, although they are not nearly as versatile or flexible. Since filters and queries are related, Access lets you store a filter as a named query. To do this, make sure you have the Filter window displayed. Then, select the Save As Query option from the File menu, or click your mouse on the Save As Query tool on the toolbar. In response, Access displays the Save As Query dialog box, as shown in Figure 5-7.
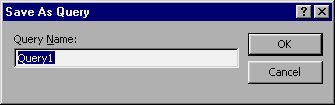
Figure 5-7 The Save As Query dialog box.
Enter the name by which you want to save this filter. The name can be any name you desire. As an example, if you want to save the filter that displayed the inventory items supplied by Allied Industries, you can use the name Supplied by Allied Industries. Type the name and press ENTER or click your mouse on the OK button.
To later reuse the filter, display the Filter window and select the Load From Query option from the File menu. Access displays the Applicable Filter dialog box, as shown in Figure 5-8.
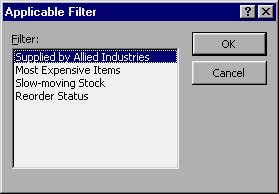
Figure 5-8 The Applicable Filter dialog box.
Highlight the name of the query you want to load as a filter and choose OK. Access loads the filter. You can then use the filter or make any other changes to the filter you desire.
Learn Access Now! Chapter 4 Previous Section in Chapter 5 Next Section in Chapter 5 Chapter 6