Learn Access Now! Chapter 7 Previous Section in Chapter 8 Next Section in Chapter 8 Chapter 9
Chapter 8: Creating Simple Reports
(This is section 4 of 5 in this chapter)
Creating Mailing Labels
Note: This section uses the Customer database you created in Chapter 4, "Creating Another Database," and built upon in Chapter 6, "Using Queries to Examine Your Data." If you do not have that database available, you may want to use the Customer 2.mdb database located on the CD-ROM. You should copy the file to a directory on your hard drive and rename it Customer.mdb.
In the previous section you learned that you can use the Label Wizard to create mailing labels. Mailing labels, of one form or another, are a common need in almost every business. Assuming you have the Customer.mdb database loaded, you can start the process of easily creating mailing labels by choosing Report from the Insert menu. This displays the New Report dialog box, shown earlier in Figure 8-9.
Using the drop-down list at the bottom of the dialog box to select the Business Customers table as your data source. When you have done this, highlight (select) the Label Wizard option and click your mouse on the OK button. Shortly, Access displays the first step in the Label Wizard, as shown in Figure 8-10.
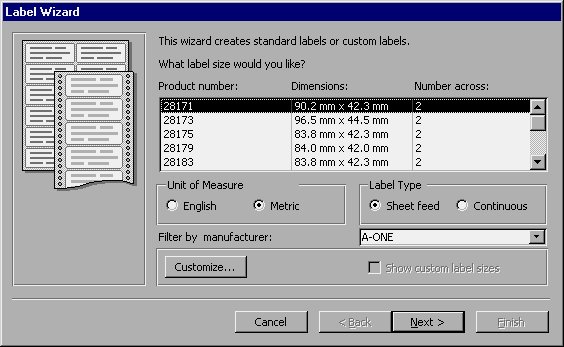
Figure 8-10 Picking a label type.
The first step in creating your labels is to indicate the type of labels you want to use. Fortunately, Access makes it very easy to specify a type of label. While there are many different labels available on the market, the industry has become very standardized on several different types of labels. The Label Wizard supports over 650 different labels from 13 different manufacturers. Chances are good that you can find your specific label already predefined by Access.
To pick a label type, use the three controls in the middle of the dialog box to filter which labels are displayed. The three controls are as follows:
- Unit of Measure. You can select either English or Metric. Your choice dictates which labels are displayed in the product list.
- Label Type. You can select either Sheet Feed or Continuous. (Sheet-feed labels are used with printers that require you to manually feed each sheet of labels. Continuous labels are used when the printer handles the feeding for you.) Again, your choice dictates which labels are displayed in the product list.
- Filter by Manufacturer. Use this pull-down list to indicate who made your labels. Only labels produced by that manufacturer will be listed in the product list.
If you are in the US, and you don't see your manufacturer listed, pick Avery. Most label manufacturers have standardized on the same sizes supported by Avery. Some even quote Avery label numbers somewhere on their packaging. (I purchased some Xerox labels the other day, and the box included an Avery number that was equivalent to the Xerox labels.) Even if you can't find an Avery label number, you can always refer to the Dimensions column on this dialog box to figure out which label you want to use.
Note: If you cannot find the label you want, or an equivalent label, you can click your mouse on the Customize button to indicate the specifications of the labels you are using.
In this example, you are creating standard mailing labels (1" × 4"), two across. This is Avery label 5261. These labels let you print 6 lines per label and are designed for laser printers. Since this is a standard label size, it is also produced by many other vendors. For the purposes of this example, specify English measurements, Sheet Feed labels, and Avery as the manufacturer. Then select the 5261 labels.
Choosing Fonts and Colors
Click your mouse on the Next button to signify you are done selecting a label type. You are now ready to specify fonts and colors. As such, Access will display the dialog box shown in Figure 8-11.
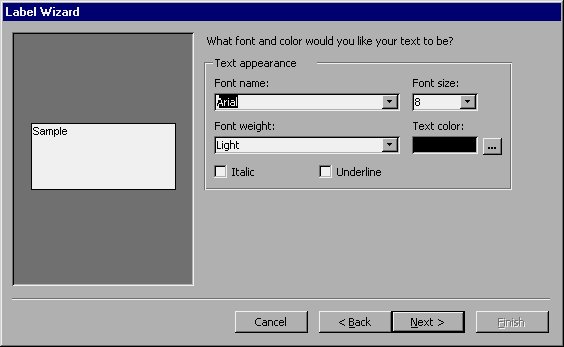
Figure 8-11 Picking fonts and colors.
The font and size the Wizard suggests is an 8-point Arial, using a light font weight. This is a rather small point size, and you should probably increase it a bit, if you can. Whether changing the font size works or not will depend on your printer and its capabilities. For the purposes of this example, leave the point size unchanged, but change any other type specifications you desire. For instance, you may want to change the Font Weight specification to Normal or Bold. Unless you have a color printer, there is not much sense in changing the Text Color setting.
Picking Label Content
After you have specified which font to use, click your mouse on the Next button. Access displays the dialog box shown in Figure 8-12.
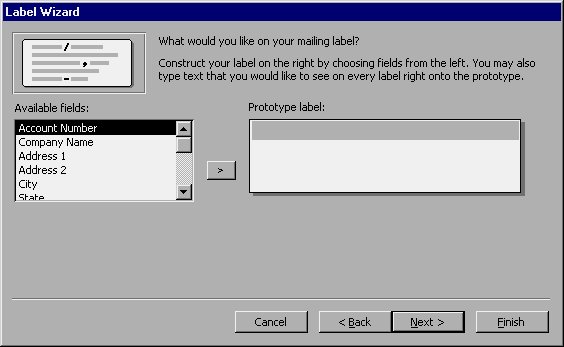
Figure 8-12 Indicating label content.
The Label Wizard lets you specify how you want your label to appear. At the left side of the dialog box you can choose different fields from your table. You can also enter free-form text which will appear on every label. You will want to do this to insert spaces, commas, periods, and the like.
Since you only have six lines to work with, you need to plan how you want your label to appear. The Wizard will use two lines for space at the top and bottom of each label, which leaves you only four lines to work with. You know that the company name and address will take three lines. This means you have an additional line to play with. It might be helpful (to the account) if you used the top line of the label to display the account number.
To create a label in this format, follow these steps:
- In the Prototype label box, enter the text Your account number is. (Don't forget to add a trailing space at the end of the text. This space will separate the text from the actual account number.)
- Select the Account Number field in the field list, and then click your mouse on the > button. This moves the account number to the end of the first line in the label. You are now done with the first line.
- Press the ENTER key. This finishes the first line and moves to the second line of the label.
- Click your mouse on the Company Name field in the field list, and then click your mouse on the > button.
- Press the ENTER key.
- Click your mouse on the Address 1 field in the field list, and then click on the > button.
- Press the ENTER key.
- Click your mouse on the City field in the field list, and then click on the > button.
- Type a comma followed by a space.
- Click your mouse on the State field in the field list, and then click on the > button.
- Type two spaces.
- Click your mouse on the Zip Code field in the field list, and then click on the > button.
You are now done designing your label, and it should appear as shown in Figure 8-13. Take a moment to look over your label to make sure it appears correct. If it does not, you can select the line you want to change and press the DEL key to remove the line. You can then reconstruct the line properly.
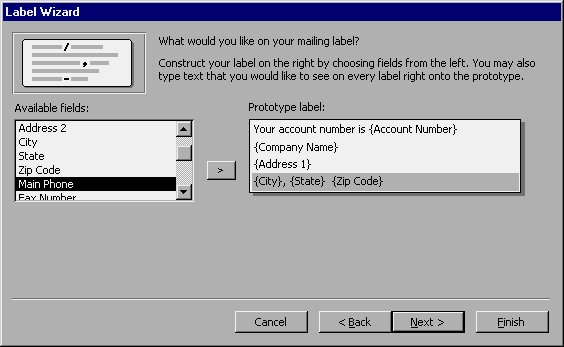
Figure 8-13 The finished label layout.
Sorting Your Labels
When you are satisfied with the label layout, click your mouse on the Next button. Access displays the dialog box shown in Figure 8-14.
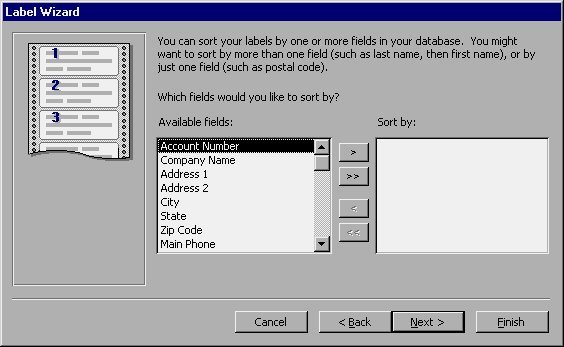
Figure 8-14 Selecting a sorting order.
Typically, you will want to sort mailing labels by ZIP Code, but you can use any field you desire. In this example, we will do a two-level sort: first by ZIP Code, and then by company name. To do this, select each of these fields, in turn, followed by the > button. Both fields should appear on the right side of the dialog box.
Finishing Your Labels
You are now ready to finish your labels. Click your mouse on the Next button. Access displays the dialog box shown in Figure 8-15.
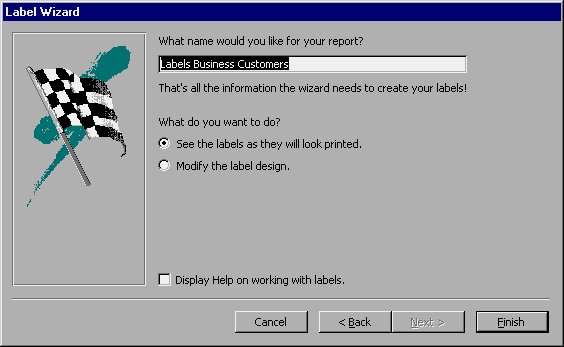
Figure 8-15 Finishing your labels.
Because it is a good idea to see your mailing labels as they will look printed, there is nothing you need to change in this dialog box. Click your mouse on the Finish button, and Access displays a print preview of your mailing labels. Figure 8-16 shows what they should look like.
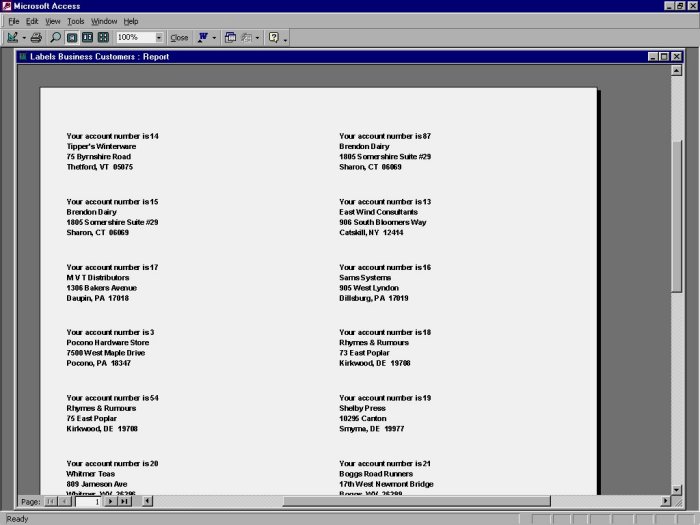
Figure 8-16 Previewing the mailing labels.
When you are done reviewing the report, close the print preview window.
Learn Access Now! Chapter 7 Previous Section in Chapter 8 Next Section in Chapter 8 Chapter 9