Learn Access Now! Chapter 1 Previous Section in Chapter 2 Next Section in Chapter 2 Chapter 3
Chapter 2: Access in an Hour
(This is section 4 of 7 in this chapter)
Changing Information in Your Table
In the previous section, you learned how to use the Datasheet view to add information to your table. The Datasheet view also lets you quickly and easily edit existing information. You can do this by following these steps:
- Select the field you want to change.
- Press the F2 key.
- Use the arrow keys to move through the field contents, making changes as desired.
- Press one of the navigation keys to have Access save your changes and move you to another field.
You can also use the mouse to speed up some of your editing. For instance, if you want to make a change in a field, click your mouse on the field. You can then perform steps 3 and 4 above.
Finding Information
If you have many records in your table, you may find it difficult to rely solely on the keyboard navigation keys to find a specific record. To help you quickly find a specific record, Access lets you search for specific data, such as a name or phone number. To search your table for specific data, select the Find option from the Edit menu. Access displays the Find and Replace dialog box shown in Figure 2-13.
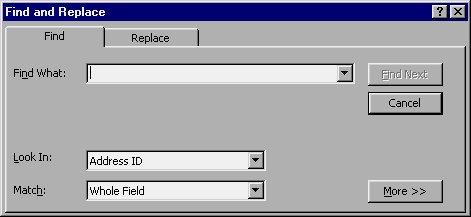
Figure 2-13 The Find tab of the Find and Replace dialog box.
In the Find What box, you enter the data you want to search for. You can enter any text into this box, such as a name, a phone number, or a city. You can also use wildcard characters to broaden your search. For example, you might want to search for the first phone number that uses the 212 area code, or the first city whose name starts with the letter A. Access provides a large number of wildcard characters you can use in your searches. Table 2-8 lists the available wildcard characters.
| Character | Meaning | |
|---|---|---|
| * | Matches any number of characters. | |
| ? | Matches any single character. | |
| # | Matches any single digit. | |
| [ ] | Matches any single character within the brackets. | |
| ! | Matches any single character except those specified. (Used with the brackets.) | |
| - | Matches any single character within a range. (Used with the brackets.) |
Table 2-8 Wildcard characters you can use while searching.
You may already be familiar with the concept of wildcards. For most people, the asterisk and question mark wildcard characters are the most familiar. The question mark can be used in place of any single character. The asterisk is used to represent any number of characters, and it can be used anywhere within a search specification. Thus, to search for anything starting with the letters br and ending in ed, you would use a search specification such as this:
br*ed
In this case, your search might match text such as breed, branded, or even bruised. If you use the brackets, exclamation point, and minus sign in your specification, you can be even more creative. The brackets let you develop a list of acceptable characters. For example, the following search specification finds the words bold and bond:
bo[ln]d
You would not find Boyd because y is not an acceptable character.
You can use the exclamation point to reverse the process. For example, if you wanted to find anything except the letters l and n in the third position, you would use the following:
bo[!ln]d
Now, Access will find the word Boyd, but not the words bold or bond.
You can use the minus sign (a dash) to specify a range of letters to be included. For instance, the following search specification will find any text with the letters c through n in the fourth position:
hea[c-n]*
If you use the Look In pull-down list, you can specify where your search should be conducted. You typically have two options available. You can either search in only the current field, or you can search in the entire table. Obviously, limiting your search to the current field results in a much quicker search.
You can also use the Find dialog box to specify the parts of your table you want to search. If you click your mouse on the arrow to the right of the Match box, you can choose to search any of the following areas:
- Any Part of Field
- Whole Field
- Start of Field
You can further specify how your search should be done by clicking your mouse on the More button. This results in an expanded Find and Replace dialog box, as shown in Figure 2-14.
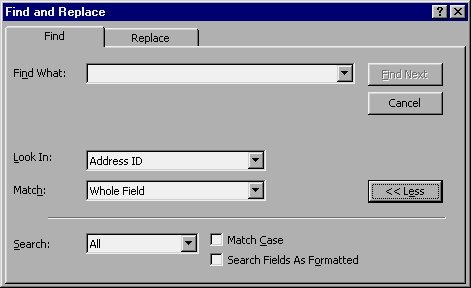
Figure 2-14 The expanded Find tab of the Find and Replace dialog box.
The newly visible area of the dialog box allows you to specify the direction in which a search should be conducted. Using the Search pull-down list, you can specify Up (toward the start of your table), Down (toward the bottom of your table), and All. You can also limit your search by selecting one of the two check boxes. They control whether Access should pay attention to upper- and lowercase in your search, and whether formatting should play a role in matches found.
After you have specified your search criteria, click your mouse on the Find Next button to display the first match to your search. If the first match does not contain the data you desire, continue the search by again clicking your mouse on the Find Next button.
Note: It is sometimes difficult to edit a field while the Find dialog box is visible. When you are ready to edit, close the dialog box and make your change. When you want to find the next occurrence of your search specification, press SHIFT+F4. This is much faster than reissuing the Find command and using the Find Next button.
Replacing Information
As you work with your data, there will be times when you need to find a field so you can change its contents. For example, if your friend's phone number changes, you will want to find and update the phone number.
The Replace option from the Edit menu, which is closely related to the Find command, lets you not only find information, but also replace it with different information. To initiate the Replace command, choose the Replace option from the Edit menu or press CTRL+H. You will see the Find and Replace dialog box, as shown in Figure 2-15.
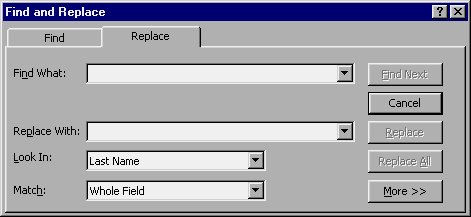
Figure 2-15 The Replace tab of the Find and Replace dialog box.
Notice that the Replace dialog box is very similar to the Find dialog box, shown earlier in Figure 2-13. In the Find What box, you type the data you want to find; you can use the same type of search specifications (including wildcard characters) discussed in the previous section. In the Replace With box, you type the new data you want to use to replace the information in the Find What box. You cannot use wildcard characters in the Replace With box.
Using the Look In drop-down list, you tell Access where you want to search (the current field or the entire table). The Match drop-down list performs the same function as when doing a simple search. Clicking your mouse on the More button displays the same additional controls shown in Figure 2-14.
After you have filled in your specifications, click your mouse on Find Next to find the next occurrence of the Find What string. When Access locates a match, it displays the match on the screen. You can then replace the match by clicking your mouse on the Replace button. When you select Replace, Access will make the replacement and search for the next occurrence of the Find What string. If, instead of Replace, you click your mouse on the Find Next button again, Access leaves the previous match unchanged and searches for the next occurrence of the Find What string. If you are absolutely sure you want to change everything in the table that meets your criteria, you can click your mouse on the Replace All button. When you select Replace All, Access automatically replaces all occurrences of your Find What text in one step.
Learn Access Now! Chapter 1 Previous Section in Chapter 2 Next Section in Chapter 2 Chapter 3