Learn Access Now! Chapter 17 Previous Section in Chapter 18 Next Section in Chapter 18 Chapter 19
Chapter 18: Creating and Using Macros
(This is section 4 of 6 in this chapter)
Running Macros
It is quite easy to run macros in Access. You can run macros directly or add them to a form. This section describes how to run a macro directly, while the next section will cover how to add a macro to a form.
You can run a macro directly in the same way that you would execute or open any other database object. Select the Macros button in the Database window, and then double-click your mouse on the macro name. (You could also select the macro name and click your mouse on the Run button.) For instance, if you double-click your mouse on the Add New Record macro, your screen will appear as shown in Figure 18-13.
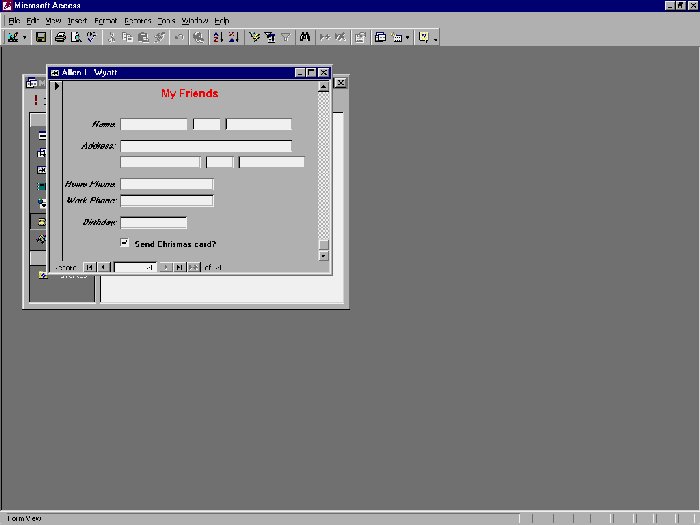
Figure 18-13 Running a macro.
Notice that your macro worked as you have planned; Access has opened the Add New Records form and prepared it to receive a new record. The macro is actually done at this point, and you can use the form window as you normally would.
Adding a Macro to a Form
When you learned how to create forms (in Chapter 9, "Creating Custom Forms"), you learned that one of the objects you can place on your form is a command button. You can use this type of button to execute macros very nicely. In this section, you will learn how to add such a button to your forms.
To begin, assume you want to create a macro that will print the contents of a particular record in your database. This is an easy macro, entailing the following steps:
- Change the mouse pointer to an hourglass
- Print the form
- Change the mouse pointer back to normal
You know how to do the first and last steps, but perhaps not the second one. To print an object in Access, you use the PrintOut action. When you first select the PrintOut action, the default arguments cause it to print the currently selected database object--all of that object, meaning every record in the form. Since you only want to print a record, you should change the Print Range argument to Selection; this will cause only the current record to print.
Create a macro called Print Form now. Your macro should contain the three steps just described: Hourglass, PrintOut, and Hourglass again. After you save the macro, you will be ready to add it to a form.
Next, click your mouse on the Forms button in the Database window. Access displays the forms in your database. Select the Review Friends form. When you click your mouse on the Design button, you will see the Design window for the form, as shown in Figure 18-14.

Figure 18-14 The form Design window.
At this point, you should turn off the Control Wizards button in the toolbox. (This is the button in the upper-right corner of the toolbox.) It is important to turn Control Wizards off so Access does not run a Wizard when you use the Command Button tool. It is better, at this point, that you understand how to set up a command button directly.
After you turn off the Control Wizards button, choose the toolbox Command Button tool. Place a command button in the lower-right corner of your form. Your button will appear as shown in Figure 18-15.
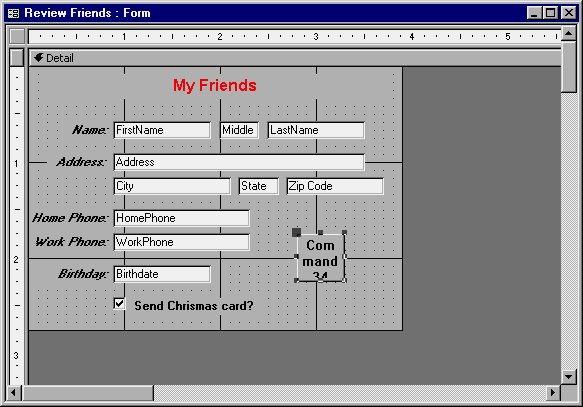
Figure 18-15 The new command button.
Go ahead and double-click your mouse on the button so you can see the Properties dialog box. There are quite a few properties which are available for this control. Most of them are fine just the way they are, but you will want to change a few of them.
First, change the Name property (on the Other tab) to something descriptive, such as Print Form. This helps you remember the purpose of the control and can come in handy if you later refer to the control. Next, select the Picture property on the Format tab. Setting this property lets you select a graphic image for the face of your button. When you click your mouse on the builder icon (...) to the right of the property, you will see the Picture Builder window shown in Figure 18-16.
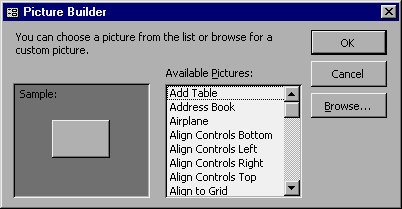
Figure 18-16 The Picture Builder window.
Scroll through the pictures in the Available Pictures list, and you will find one that says Printer. Select this picture and click your mouse on the OK button. Access makes the button look like a printer icon. This icon helps the user understand the button's purpose. The Picture Builder will disappear, and you should again see the Properties dialog box.
The next property to change is the one that controls what happens when someone clicks the mouse on the command button. Display the Event tab and select the On Click property. If you select the pull-down arrow to the right of this property's box, Access displays a list of macros available. Select the Print Form macro you developed at the beginning of this section.
You are now done setting this control button's properties. When you close the Properties dialog box, Access displays the form Design window as shown in Figure 18-17.
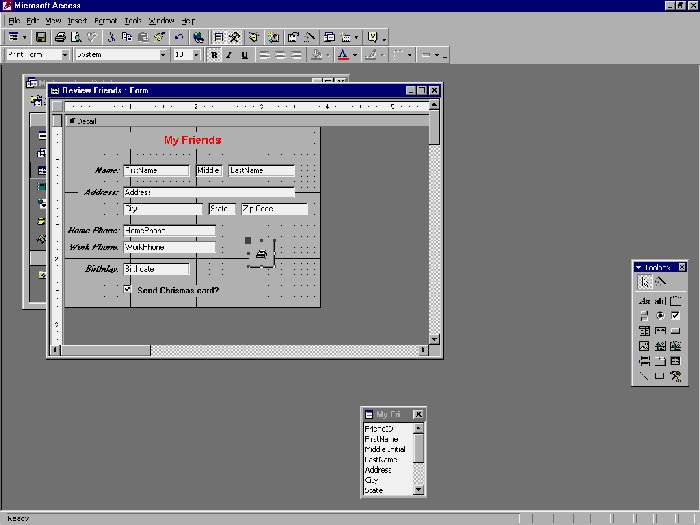
Figure 18-17 The finished form design.
Close the Design window, saving the new form design as you do so. To test the button, open the form, select a record, and click your mouse on the button. Access, in turn, should provide you with a printout of the form on the screen. Notice, as well, that the button shows up on the printout.
Learn Access Now! Chapter 17 Previous Section in Chapter 18 Next Section in Chapter 18 Chapter 19