Learn Access Now! Chapter 18 Next Section in Chapter 19 Chapter 20
Chapter 19: Working with Dialog Boxes and Menus
(This is section 1 of 3 in this chapter)
In the previous chapter, you learned how you can use macros to automate many of the tasks you normally perform in Access. In this chapter, you will build on that information to learn how you can create your own dialog boxes and menus. Using the tools presented in this chapter, you will make your macros behave very much like Access itself--using menus and dialog boxes to improve the user's interface.
By the time you finish this chapter, you will understand the following key concepts:
- How to use message boxes
- How to design dialog boxes
- How to create a switchboard menu
- How to add custom menus to your forms and reports
Adding Dialog Boxes
Note: One of the databases used in this is the My Friends.mdb database you used in Chapter 18, "Creating and Using Macros." If you do not have a copy handy, you may want to use the Friends 4.mdb database located on the companion CD-ROM. You should copy the file to a directory on your hard drive and rename it My Friends.mdb.
Within Windows and Windows-based programs, message boxes and dialog boxes are the primary means of communicating with a user. As you will learn, the same is true for your Access macros. Access lets you create and use both message boxes and dialog boxes within your macros.
Displaying Messages
You see them all the time in Windows--message boxes that inform you that something is going on or that your program needs more information in order to accomplish a task. In Access, you see a message box every time you leave a Design window after making some changes, asking if you want to save your changes.
Message boxes contain some sort of small icon, a message, and some buttons which control the actions that Access performs. You can create your own simple message boxes within Access macros. For example, a very simple use of a message box is to inform the user that Access has saved a particular record. To create such a dialog box, you develop a macro and use the MsgBox action within the macro.
First, click your mouse on the Macros button in the Database window. Next, click your mouse on the New button. Access, in turn, displays the Macro window. In this case, you will develop a one-line macro. Within the first row of the Action column, select the MsgBox action. Access displays the Macro window as shown in Figure 19-1.

Figure 19-1 The Macro window.
Now you need to set the arguments for this action. The arguments control what message, icon, and buttons Access displays within the message box.
The Message argument defines what Access displays in the message box. The text can be any message you desire, up to 255 characters in length. Access takes care of formatting the text that will appear within the message box. For this message box, set the Message property to something like The record has been added.
The Beep argument controls whether Access sounds the bell when it displays the message box. The Beep argument is a simple Yes/No property. Since Access displays this message box every time the user enters a record, the beep could get annoying; change the property to No.
The Type argument determines the type of icon Access displays in the message box. You have five choices, as detailed in Table 19-1. You should pick the type of icon that is most appropriate for the purpose of the message box. In this case, the message box is purely for informational purposes, so set the Type property to Information.
| Setting | Meaning | |
|---|---|---|
| None | Access displays no icon. | |
| Critical | Access displays a stop sign. | |
| Warning? | Access displays a question mark. | |
| Warning! | Access displays an exclamation point. | |
| Information | Access displays a lowercase i. |
Table 19-1 Possible settings for the Type property of the MsgBox action.
The Title argument controls what title Access shows at the top of the message box. If you don't specify a title, Access uses the words "Microsoft Access" as a title. The title you select is entirely up to you.
Note: When you use message boxes within a macro, Access does not let you specify the number of buttons to display in the message box. If you want to do that, you must use Visual Basic for Applications, which lets you create more versatile message boxes. The MsgBox action displays only an OK button, which makes it well suited to displaying error or other informational messages.
You are now ready to save your macro (yes, with only one action). Click your mouse on the Close icon in the upper-right corner of the macro window and save the macro under the name Record Saved.
To attach the macro to a form, you first need to display a form. (This makes sense, right?) Open the Design window of the Review Friends form and display the Properties dialog box for the entire form.
In the Properties dialog box, notice the After Insert property on the Event tab. This property lets you specify which macro Access should run right after it adds a new record to the table. Select this property and then click your mouse on the pull-down arrow at the right side of the property box. Specify that Access run the Record Saved macro. Now Access will display your new message box every time you add a new record to the table.
Note: If you need a refresher on how to set properties for an entire form, refer to Chapter 9, "Creating Custom Forms."
Save the form and then open it. Next, add a new record to the table. When you leave the record to display the next one, Access inserts the record in the table and displays your message box, as shown in Figure 19-2.
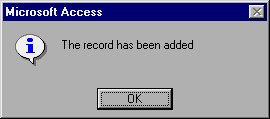
Figure 19-2 The completed message box.
Your Forms as Pop-Up Windows
Note: This section uses a version of the Customers.mdb database you developed in earlier chapters of the book. You should copy the Customer 7.mdb database from the companion CD-ROM to a directory on your hard drive and rename it Customer.mdb. You should do this rather than using any older versions of Customers.mdb, since the CD-ROM version has some new forms in it that you will need.
You already know from Chapter 9, "Creating Custom Forms," that Access lets you create virtually any type of form you can imagine. These forms can contain many different controls, and you can use them to enter, display, edit, or manipulate the information in your data tables. Normally, you simply open these forms in order to use them. You may, however, want to create a form that Access uses as a pop-up window. For example, consider this scenario:
- You create a form that adds customers to a table. You can use this form for the main information about the customers.
- You create a second form for ancillary customer information, such as the name of the sales rep on the account.
- On the main form, you place a command button titled "Other Info." When the user clicks the mouse on this button, Access again presents the secondary form. When the secondary form is closed, Access returns the user to the main form.
Such a scenario is easy to implement in Access. All you need to do is develop the two forms and then tie them together using the command button.
If you loaded the Customer database, the two forms for this example are the New Account Setup and the Ancillary Info forms (the are already created in the database). These forms are tied into each other, such that Ancillary Info "pops up" on the screen when you click your mouse on the command button. Figure 19-3 shows how the New Account Setup form looks when it is running.
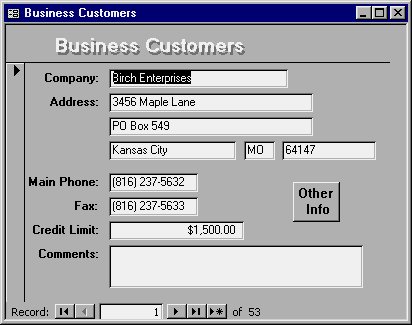
Figure 19-3 The New Account Setup form.
When you click your mouse on the Other Info command button, Access executes the Display Ancillary macro. This macro contains only a single line, which opens the Ancillary Info form using the OpenForm action. The action's Where argument is set to an expression that ensures the record Access displays in Ancillary Info is the same record Access displayed in the New Account Setup form.
Take a look at the form properties set in the Ancillary Info form. There are a number of these properties set to make the form behave like a dialog box. These properties include the following:
- Scroll Bars (Format tab properties). This property determines if Access displays scroll bars in the form. This is set to Neither, since dialog boxes typically don't have scroll bars.
- Record Selectors (Format tab properties). If set to Yes (the default), a record selector appears at the bottom of the dialog box. Since this form edits only the current record, as determined in the New Account Setup form, this property is set to No.
- Navigation Buttons (Format tab properties). Determines if the record navigation buttons appear at the bottom of the dialog box. This property is set to No since you don't want users to move around the records using this form.
- Pop Up (Other tab properties). This property is set to Yes to indicate that you are creating a pop-up dialog box rather than a normal form.
- Modal (Other tab properties). If set to Yes, this dialog box (the form you are creating) will remain active until the user closes it. This property is set to Yes to force the user to deal with the dialog box before proceeding.
- Border Style (Format tab properties). There are four types of borders you can use for the form: None, Thin, Sizable, and Dialog. Since you are creating a dialog box, this property is set to Dialog.
- Control Box (Format tab properties). Determines whether the Control menu is available from the dialog box. Most dialog boxes have a Control menu, so this property is set to Yes.
- Min Max Buttons (Format tab properties). Determines if the dialog box has a minimize and maximize buttons. Typically, this property should be set to None.
- Close Button (Format tab properties). Determines if the dialog box has a Close button. Typically, this property should be set to Yes.
Note: Don't set both the Control Box and Close Button properties to No unless you provide some other way to close the dialog box (such as a Close button on the dialog box itself). If you don't provide some way out of the dialog box, you will never be able to close it.
With these properties set in this way, the Ancillary Info form behaves just like a regular dialog box. When a user clicks their mouse on the Other Info button, the dialog box appears. The user can then change or enter the information and close the dialog box. Figure 19-4 shows what your screen looks like when Access displays this dialog box.
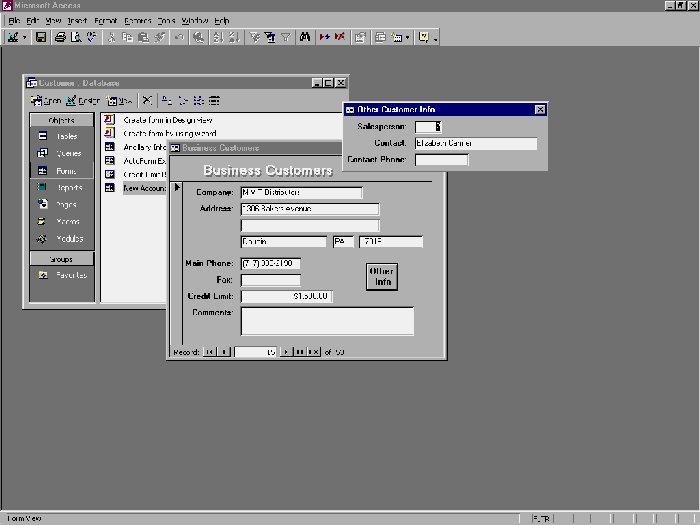
Figure 19-4 Using the Ancillary Info form as a dialog box.
Learn Access Now! Chapter 18 Next Section in Chapter 19 Chapter 20