Learn Access Now! Chapter 16 Previous Section in Chapter 17 Next Section in Chapter 17 Chapter 18
Chapter 17: Using OLE
(This is section 2 of 5 in this chapter)
Putting Objects in Your Table
To place OLE objects in one of your Access tables, you need to define a field to hold the object. To do this, Access provides a special data type called OLE Object. You may remember this data type from Chapter 2, "Access in an Hour." This is the only data type you can use to store OLE objects.
As an example of how to use this data type, assume you are going to set up a database to keep track of your graphical images. You have created a database, which has the layout shown in Figure 17-2.
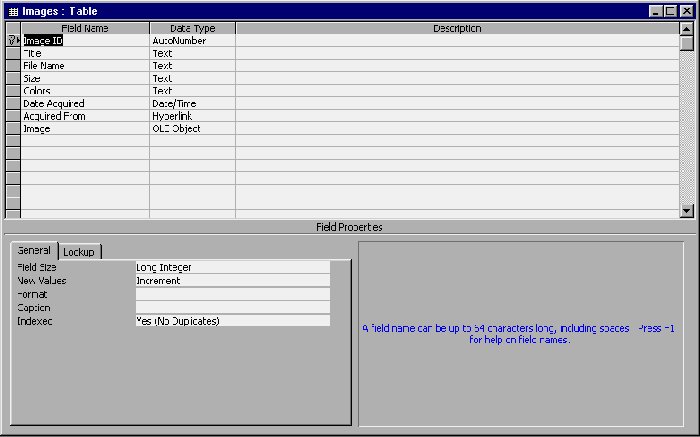
Figure 17-2 Layout of the Images database.
The last field in this layout, Image, is the OLE field. Notice that the field's data type is OLE Object. This field can contain any object linked to or embedded from an OLE server.
Note: The companion CD-ROM included with this book includes a file called Images 1.mdb. You can copy this database file to your hard drive (use the name Images.mdb) for the purposes of this chapter, if you would like.
Inserting an Existing Object
There is a form in the Images database called Review Images. If you open this form, you will see that it lets you leaf through a small, image collection. If you want to add an image to this collection, simply move to the last record. The form should appear as shown in Figure 17-3.
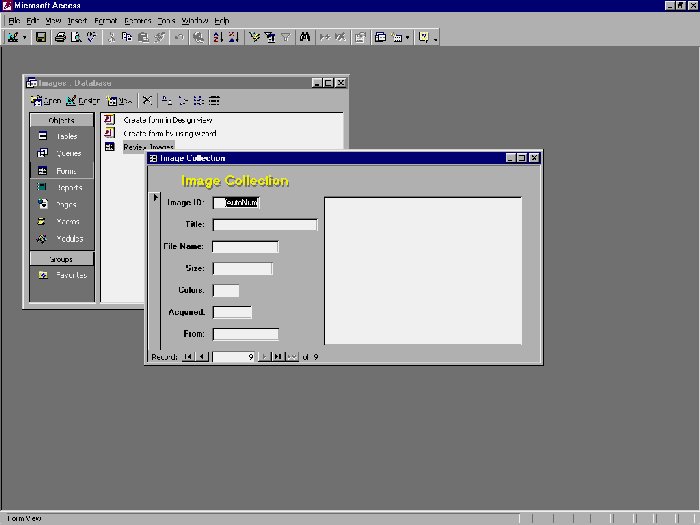
Figure 17-3 Ready to input a record.
Click your mouse on the image area and then choose the Object option from the Insert menu. Access displays the Insert Object dialog box shown earlier in Figure 17-1. This is the general-purpose object insertion dialog box. Since you want to insert an object from an existing file, click your mouse on the Create from File option at the left side of the dialog box. Notice that quite a few options change; the dialog box now looks like that shown in Figure 17-4.
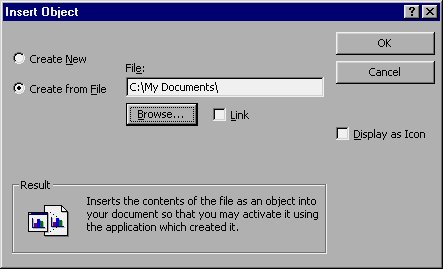
Figure 17-4 Inserting an existing file.
Access uses the dialog box to ask you for the name of the file you want to insert. Type in the name of a graphic file, or click your mouse on the Browse button to find the file on your disk. Make sure that the file you provide has a program associated with it that can function as an OLE server. Remember, Access will let you insert objects only if they were created or manipulated with an OLE server.
For example, when I installed Microsoft Office 2000 on my system, Internet Explorer 5 was automatically installed at the same time. IE5 can be used as an OLE server. This program can be used to view many of the common types of files found on the Internet, including many graphics files. When IE5 was installed on my system, it registered the common file types with Windows so that the operating system knew which program could be used to load and view those types of files. Since IE5 is an OLE server, I can insert images it can display into Access.
Having found the file I want to insert as an object, all I need to do is click my mouse on the OK button. Windows takes care of the rest; it recognizes that the graphics file I am inserting is one of the types handled by IE5. It therefore inserts an IE5 icon in my database to show that there is an active OLE link between the image and the program Windows thinks should handle the image. This icon is shown in Figure 17-5.
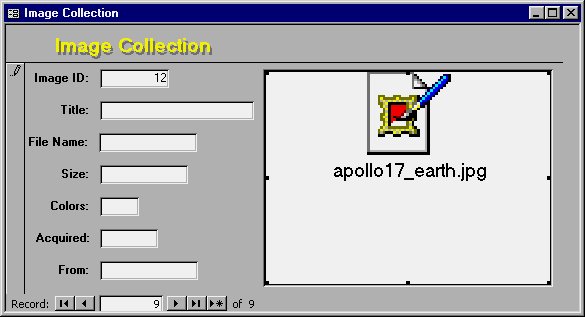
Figure 17-5 After inserting an image.
With the image inserted, the other fields in the database record can be modified to indicate the proper information for the image. When you are done, you can move on to another record or close the form window entirely.
Inserting a New Object
Inserting a new object comes in handy if you are creating objects on the fly. One practical use for objects is as sound annotation for your database. If you have a sound card with a microphone hooked up, you can add "verbal comments" (annotations) to your records. Such annotations could come in handy when you later want to review what you thought about a particular item.
In addition, verbal comments are often more effective than those typed into a field. This is because you can use your voice to express emotion; it is impossible to do that effectively with the written word.
Figure 17-6 shows an example of how a sound annotation can be added to a form. Notice that the sound shows up as a regular sound icon in the small OLE object field. (Windows doesn't do a great job of centering icons in the available space, so the icon looks a bit off-center.)
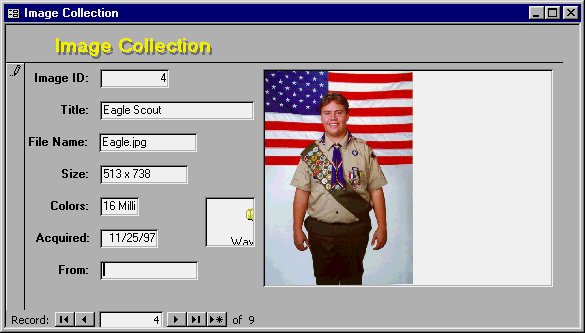
Figure 17-6 The Images file with sound annotation added.
To add such a field, all you need to do is add another field to the table with the OLE Object data type. Then, modify the form design to position the field in the proper place. When you later use the form, all you need to do is select the sound annotation field and choose the Object option from the Insert option. Access will display the Insert Object dialog box; you should scroll though the Object Type list until you select the Wave Sound object, as shown in Figure 17-7.
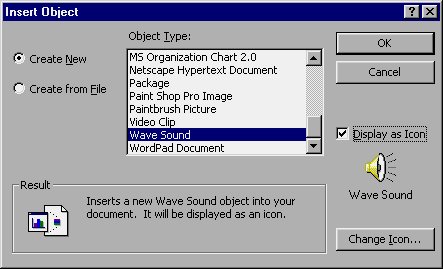
Figure 17-7 The Insert Object dialog box.
When you click your mouse on the OK button, Access starts the OLE server (the Sound Recorder). You can then record your comments. When you close the recorder, Access saves your comments as part of the Images database.
Creating an Editable Link
You also can use the Windows Clipboard to insert a linked image into your database. Assume you are working with an Excel worksheet, and you create a chart (see Figure 17-8). You are so impressed with the chart that you decide you want to save it for posterity in your Image database.
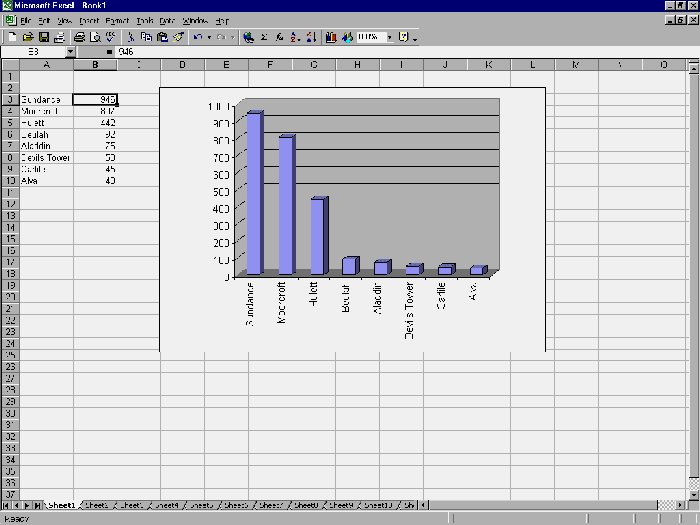
Figure 17-8 The Excel worksheet and chart.
While you could establish an OLE link with the chart as you have done previously in this chapter, you can also use the Clipboard to save the chart. To do so, perform these steps:
- Use your mouse to select the Excel chart.
- Choose the Copy option from the Edit menu, or press CTRL+C to copy the chart to the Clipboard.
- Switch to the window containing Access. Display the record where you want to save the chart.
- Select the image area in the record.
- Choose the Paste Special option from the Edit menu. Access displays the Paste Special dialog box, shown in Figure 17-9.
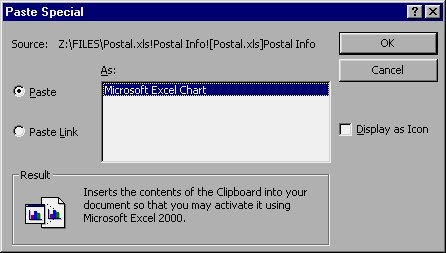
Figure 17-9 The Paste Special dialog box.
- Choose the Paste Link option, on the left side of the dialog box.
- Click your mouse on OK. Access pastes the image into the database, as shown in Figure 17-10.
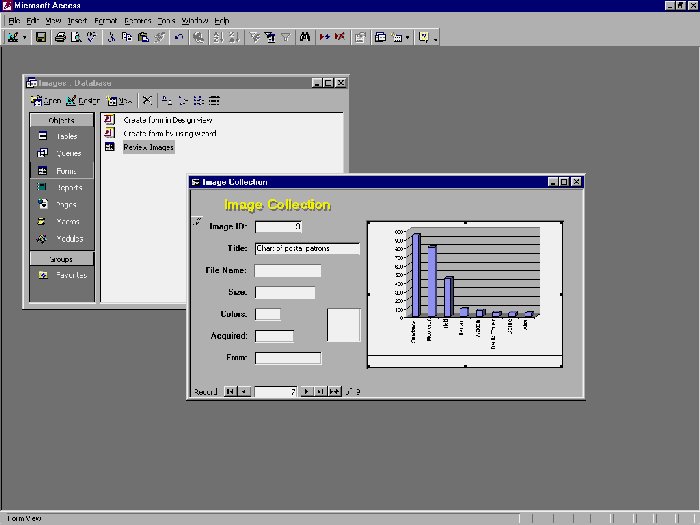
Figure 17-10 The pasted image.
Depending on the application you are copying information from, the Paste Special dialog box can contain many different formats in which you can save your image. When the original image comes from an OLE server program, at least one of the formats will always be the name of the OLE server program. To establish the best relationship between the server and Access (the client), you should pick the link option and the OLE server program format. Later in this chapter, you will learn how you can edit the links you set up in this section.
Changing Object Icons
You may have noticed that when you start dealing with OLE links, Access can be very slow to refresh your screen. Access slows down because of the amount of information that it must process to display each screen. This slow down is particularly evident when you are working with large graphic files. To minimize this condition, you can tell Access to display your objects as icons instead of as actual images.
Displaying an object as an icon will speed up how fast Access can display information. It also will make your database less visual, meaning the object's purpose won't always be readily apparent. To use icons instead of actual images, take another look at the Insert Object dialog box shown in Figure 17-11.
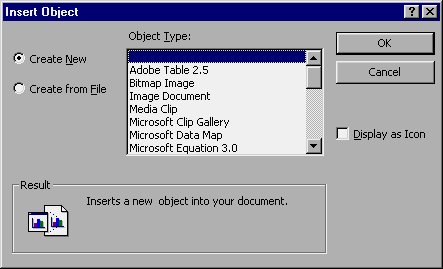
Figure 17-11 The Insert Object dialog box.
Notice the Display As Icon option on the right side of the dialog box. If you pick one of the object types and then select the Display As Icon option, you will notice a change in the dialog box, as shown in Figure 17-12.
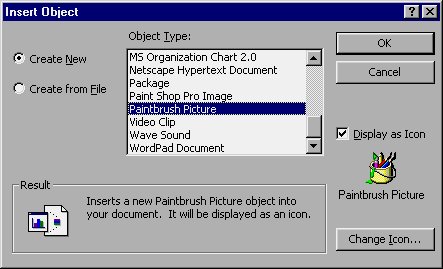
Figure 17-12 After selecting the Display As Icon option.
If you select a different object type, the icon that Access will use for an object will change to represent the different source. You can also change the icon by clicking your mouse on the Change Icon button. When you do, Access displays the Change Icon dialog box, as shown in Figure 17-13.
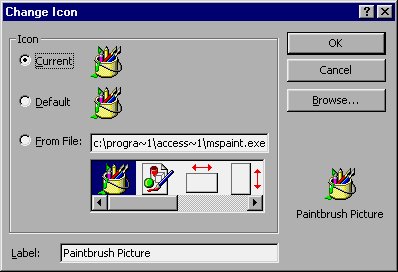
Figure 17-13 The Change Icon dialog box.
The number of different icons available varies from program to program; there is no standard amount. For instance, this program file (for Paintbrush) has many different icons available. You can select the icon that suits you best.
Note: If you don't like the icons available in the current program file, click your mouse on the Browse button to look through other files for icons. You might try looking through the file MORICONS.DLL in the Windows subdirectory. It contains quite a few different icons.
When you are done picking an icon, click your mouse on the OK button. Access returns you to the Insert Object dialog box, where you can complete the object insertion. Click your mouse on OK from the Insert Object dialog box to insert the object in the database. In this case, Access only displays an icon, as shown in Figure 17-14.
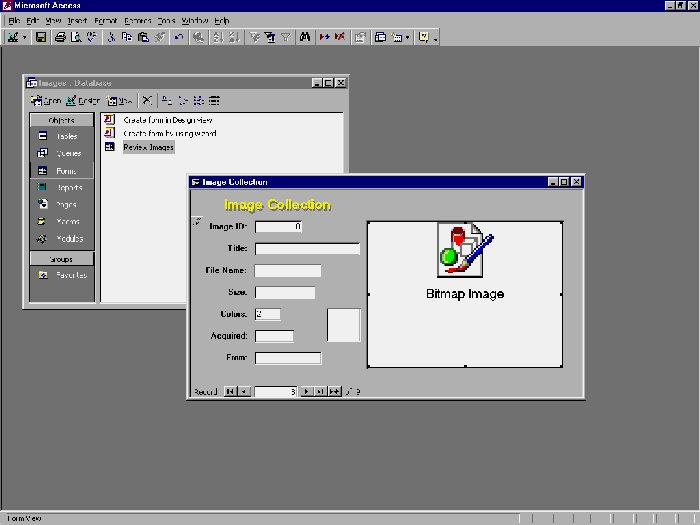
Figure 17-14 Icon displayed instead of an image.
Learn Access Now! Chapter 16 Previous Section in Chapter 17 Next Section in Chapter 17 Chapter 18