Learn Access Now! Chapter 11 Previous Section in Chapter 12 Next Section in Chapter 12 Chapter 13
Chapter 12: Using Web Features
(This is section 2 of 4 in this chapter)
Using Hyperlinks
If you have been using the Web for any length of time, you are probably familiar with hyperlinks, even though the name may not be familiar. Hyperlinks are areas in a Web page where you can click your mouse and subsequently visit a different place on the Web. A hyperlink can be text, or it can be a graphic. In Figure 12-1, the hyperlinks that are easiest to recognize are those which show up as underlined text. If you move the mouse pointer over these, it changes to a pointing hand. Click the mouse button and the Web browser displays the page pointed to by the hyperlink.
The whole purpose of hyperlinks is to make it easy to navigate the Web. You can literally "click and go" to jump to related or interesting information anywhere in the world. This navigation process is referred to as "surfing the Web."
Access allows you to include hyperlinks in your database. These hyperlinks don't just need to refer to Web pages available through the Internet. Indeed, they can refer to other locations in an Access database, or even locations in documents maintained by other Microsoft Office products.
The Hyperlink Data Type
You learned about data types in Chapter 4, "Creating Another Database." One of the data types supported by Access is the Hyperlink data type. This is a special data type that Access uses to identify addresses which should be treated as links. The links can be either to other data or to Web addresses.
Information stored in a Hyperlink field consists of four parts, as follows:
- Text to display. The text that represents the hyperlink. This is analogous to the underlined text on a Web page (see Figure 12-1).
- Address. The address that serves as the target of the hyperlink. (You learned about addresses earlier in this chapter.)
- Subaddress. A location within a document specified by the Address portion of the hyperlink.
- Screentip. The ToolTip displayed when the mouse pointer hovers over the hyperlink.
The only part of these four that is mandatory is the address; the others are optional. Each part of a complete hyperlink is separated from the others by a # sign. Thus, the following is a valid Hyperlink field, in the eyes of Access:
My Link#http://www.web.com/Stuff/ThisPage.htm##Cool location!
This example does not include the optional subaddress, so that portion is left blank. All the other portions are included.
While you can construct your hyperlinks by hand (using the four parts described previously), you don't have to. Fortunately, Access offers an easy way to insert hyperlinks into a Hyperlink field, as described in the following section.
Defining a Hyperlink
Before you can define a hyperlink in Access, you need to know the address you want to use for the hyperlink. Remember that hyperlinks are designed to be "clickable," and when someone clicks their mouse on one, they are taken to the target of the hyperlink. This target is nothing more than an address, which you learned about earlier in the chapter.
Fortunately, Access allows you to discover the address you want used for your hyperlink after you start the insertion process. First, select the field in a Datasheet or a form that will contain the hyperlink. This field should use the Hyperlink data type, as defined in the previous section. Then choose Hyperlink from the Insert menu. Access displays the Insert Hyperlink dialog box, as shown in Figure 12-3.
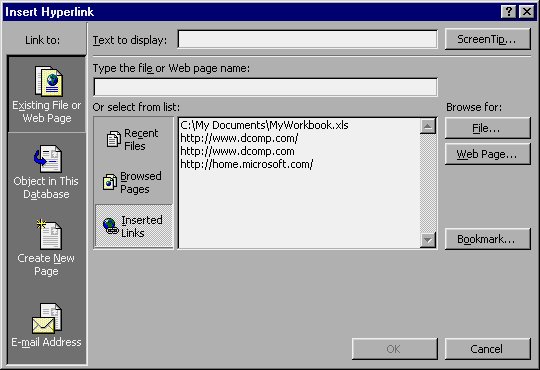
Figure 12-3 You can insert a hyperlink in Access.
The Insert Hyperlink dialog box may look overwhelming at first, but it is really quite manageable if you remember that there are only two things you need to provide: text for your hyperlink and an address. In fact, if the field you selected before displaying the Insert Hyperlink dialog box had any text in it, the Text To Display field should already be filled in. The text you specify (or accept) in this field is what ends up underlined and "clickable" in the field.
The other field in the dialog box is where you specify the address for your hyperlink. If you already know the address, simply type it in using the full and proper format, as described earlier in the chapter. If you don't know the address, or you are unsure of how it should be put together, you can use the controls in the dialog box to help find the address.
For example, let's assume you wanted to create a hyperlink to a form in a different database. To do this, all you need to do is click your mouse on the File button. This displays the Link to File dialog box, as shown in Figure 12-4.
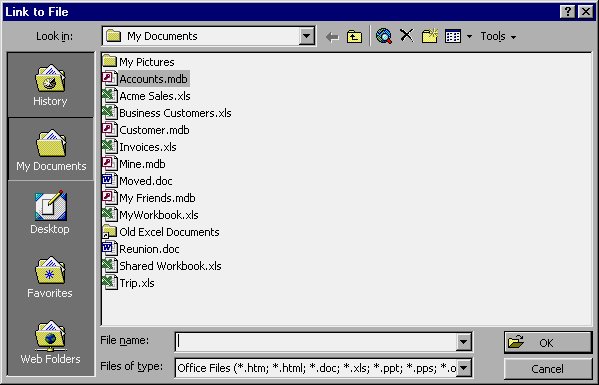
Figure 12-4 You can select a file to use for your hyperlink target.
This dialog box is very similar to a standard Open dialog box. All you need to do is use the controls in the dialog box to help locate the file you want to use for the target of your hyperlink. When you have found the file and selected it, click your mouse on the OK button. Access places the Web address of the file (even if it is on your machine) into the address field of the Insert Hyperlink dialog box.
You are still not done, however. Remember that you wanted your link to specify a form in the database. To specify a particular query, click your mouse on the Bookmark button. Access displays the Select Place in Document dialog box, as shown in Figure 12-5.
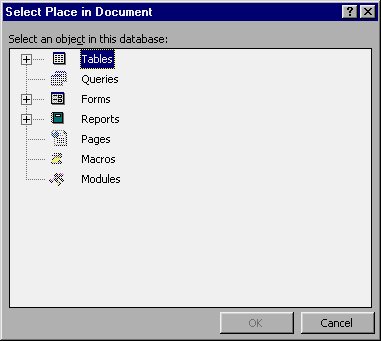
Figure 12-5 Picking an object from a database.
Here you can use the tree structure in the dialog box to select an object in the document. (Yes, Access refers to databases using the generic name "document.") Simply click your mouse on the plus sign beside the Forms category to see the forms defined in the database. Then select the desired form from those listed.
When you click your mouse on the OK button, Access modifies the address in the Insert Hyperlink dialog box so it shows the database file name and object name in the database. Figure 12-6 shows what the dialog box looks like with the address filled in.
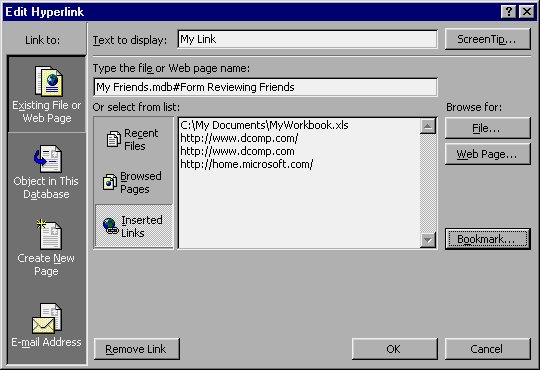
Figure 12-6 Access determines an address based on your specifications.
If you had not filled in anything previously in the Text to Display field, Access would have automatically filled it with the same hyperlink address you just put together. You can still change the text in the field, using any text you desire.
When you finally click your mouse on OK, Access inserts the hyperlink in your document, in the field you indicated.
Activating a Hyperlink
As you learned earlier in the chapter, when you are using a Web browser and you move your mouse pointer over a hyperlink, it changes to a pointing hand. When you click on the mouse button, the Web browser jumps to the Web address that is the target of the hyperlink.
Access is no different. You use your newly defined hyperlinks by moving the mouse pointer over them. The pointer changes to the same pointing hand you use in your Web browser. When you click your mouse on the hyperlink, Access jumps to the location. If necessary, Access even opens the application program required to display the target. For instance, if the hyperlink is to a location on the Web, your Web browser is opened. If the hyperlink is to a Word document, then Word is opened.
It is interesting to note that you can move the mouse pointer over a hyperlink, and if you leave it poised there (when it is shaped as a pointing hand), a ToolTip appears beside the pointer to indicate the target address associated with the hyperlink. This is a handy way to tell where clicking your mouse on a hyperlink would take you, before actually taking the plunge.
Editing a Hyperlink
It is not uncommon to need to change either the text used by a hyperlink or the hyperlink target. Access allows you to change both of these. The easiest way is to simply right-click your mouse on the hyperlink, choose Hyperlink from the Context menu, and then choose Edit Hyperlink from the submenu. Access displays the Edit Hyperlink dialog box, as shown in Figure 12-7.
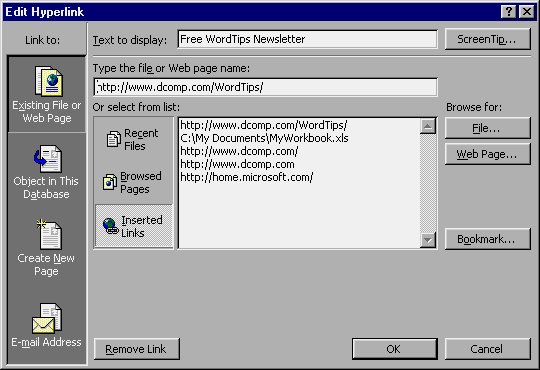
Figure 12-7 The Edit Hyperlink dialog box.
The Edit Hyperlink dialog box looks almost exactly like the Insert Hyperlink dialog box used earlier in the chapter. All you need to do is change either the text or the target, as desired. When you are satisfied with your changes, simply click your mouse on OK.
Deleting a Hyperlink
There may come a time when you no longer need a particular hyperlink in your worksheet. Fortunately, deleting a hyperlink in Access is very easy to do. There are two ways you can go about it. First, you can right-click your mouse on the hyperlink, thereby displaying a Context menu. From the Context menu, choose the Hyperlink option. This displays a submenu from which you should choose Remove Hyperlink. Access dutifully removes the hyperlink. This method of deleting a hyperlink is handy if you like to work almost exclusively with the mouse.
If you are more of a keyboard-oriented person, all you need to do is select the field in which the hyperlink is located and press the DEL key. You cannot select the field, however, by clicking on it with the mouse; trying to do so is the same as activating the hyperlink. Instead, you must select a field adjacent to the hyperlink field, and then use the arrow keys to select the field whose hyperlink you want to delete.
Learn Access Now! Chapter 11 Previous Section in Chapter 12 Next Section in Chapter 12 Chapter 13