Learn Access Now! Chapter 5 Previous Section in Chapter 6 Next Section in Chapter 6 Chapter 7
Chapter 6: Using Queries to Examine Your Data
(This is section 3 of 4 in this chapter)
Designing Your Own Queries
Up to now, you have used the Query Wizards to create your queries. This is great, but the Query Wizards only create a few specialized queries. If one of those queries does not meet your needs, you can create your own query from scratch.
Many people think that developing queries from scratch is one of the most difficult parts of working with Access. In many ways they may be right. But with a little guidance and a lot of practice, you can develop just about any query you can imagine.
As you create queries from scratch, you will learn many principles which you can also apply when you edit existing queries. Either way--creating or editing--you will use the query Design window.
The process you follow to create a query depends, in large part, on the type of query you want to create. Regardless of the query type, you should always start in the same way: select the Queries button in the Database window and then double-click your mouse on the Create Query in Design View option. Your screen will then appear as shown in Figure 6-19.
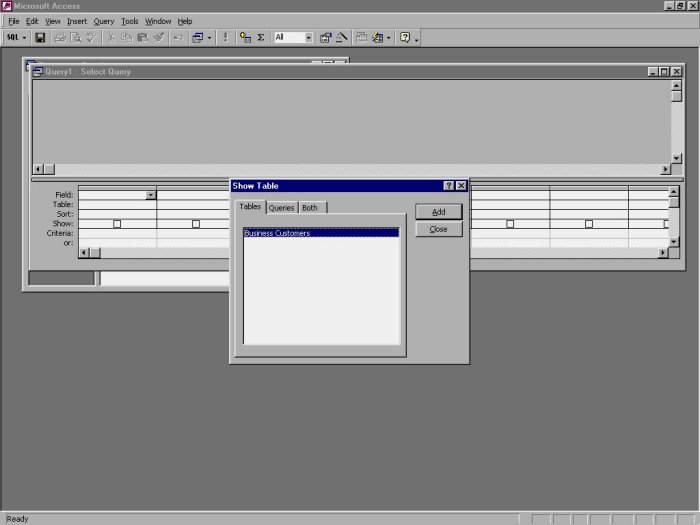
Figure 6-19 Creating a query.
Notice that the query Design window is in the background. In the foreground, Access displays the Show Table dialog box, which asks you to select the data sources you want to use. As in any other query, you can select either tables or queries as data sources (notice the tabs in the dialog box). In this case, select the Business Customers table and click your mouse on the Add button. Access opens a small field window for the table, keeping the Show Table dialog box open. To close the Show Table dialog box, click your mouse on the Close button.
After you close the Show Table dialog box, Access displays the query Design window in the foreground. In the middle of the Design window is a space for the data sources you have opened. In this case, the space contains the Business Customers table. Below that is the QBE (query by example) grid. The query Design window should appear as shown in Figure 6-20.

Figure 6-20 The query Design window.
In the QBE grid, you specify the criteria for your query. The options available in the grid will depend on the type of query you are creating.
The Query Design Toolbar
The query Design toolbar appears just below the menu whenever you are using the query Design window. Many of the tools on the toolbar should already be familiar, as they are used in other Access windows. Other tools, however, are unique to the query Design toolbar. Table 6-1 shows these unique tools and what they accomplish.
| Tool | Name | Purpose | ||
|---|---|---|---|---|
 | Query Type | Allows you to specify the type of query you are creating. | ||
 | Run | Executes the query, if necessary. | ||
 | Show Table | Displays the Show Table dialog box, as shown earlier in Figure 6-19. | ||
 | Totals | Displays the totals row of the QBE grid. Not available when creating an Update or Delete Query. | ||
 | Top Values | Finds the top values in a query based on a percentage or number of rows. | ||
 | Properties | Displays the Properties window, either for query fields or the query itself. | ||
 | Build | Displays the Builder window, which some people prefer when creating criteria for a field. |
Table 6-1 Query design tools.
You may often use the Query Wizards to create your run-of-the-mill queries, which means you will use the query Design window for those that are more specialized. Thus, you will normally use the Query Type tool at the beginning of your design session to indicate what type of query you are creating. If you click your mouse on the down-arrow at the right side of the tool, you can see that Access allows you to create the following types of tools:
- Select Query. The default query type. Lets you develop a query that returns a number of records that meet your criteria.
- Crosstab Query. Modifies the QBE grid so its options represent those needed for a Crosstab query.
- Make-Table Query. An Action query that creates a new table. Access uses this table to store the results of the main part of the query. When you choose this tool, Access asks you the table name and where Access should store the table. The QBE grid is the same as for a Select query.
- Update Query. An Action query that updates numerous records in a table. Access modifies the QBE grid to represent the query's needs.
- Append Query. An Action query that appends records to a table. When you choose this tool, Access asks you the table name and where it should store the table. Access modifies the QBE grid to reflect the criteria for this type of query.
- Delete Query. An Action query that deletes records. Access modifies the QBE grid to a simpler format than the other queries.
These query types should look familiar; they are basically the same as those discussed at the beginning of this chapter.
Using the QBE Grid
Regardless of the type of query you create, you will always use the QBE grid to design the query. You can manipulate items in the grid in the same ways you can in other Access design grids. For example, in Chapter 5, "Sorting and Filtering Information," you learned how you can use the Filter window grid. The QBE grid works the same way; you can add columns, delete columns, and move columns around. You can also select cells in the grid and edit them.
The meaning of the rows in the QBE grid will vary depending on the type of query you are designing. The top row, however, always contains a field name. Each column in this row represents a field that Access will show in the query result. Thus, if you want to display five fields in your query result, you would use five columns in the QBE grid. Access displays fields in the same order you place them in the grid. However, how you set the Show row for each field controls whether or not Access displays the field. (see Figure 6-21).

Figure 6-21 The QBE grid.
If you select Show row for a particular column, Access displays that field in the results. If you don't select the Show row, Access doesn't display the field. Why would you not want to display a field? Simple; if you are using a column only to select or sort records, you don't need to display it. For example, if you select records based on the value of a Yes/No field (and select only those records with the field set to Yes), you know that every value in that results field will be the same (-1). As such, there is really no need to display the field. You can use the Show row to hide or display fields as you desire.
Note: The Show row is not applicable to or available with the Crosstab, Update, Append, and Delete Query tools.
The Sort and Criteria rows work the same as described for filters in Chapter 5, "Sorting and Filtering Information." If you are still not clear on their proper use, refer back to that chapter.
Perhaps the best way to discover how to use the QBE grid is just to experiment with it for a while. Assume that you want to create a query that will use the Business Customers table and display all the active accounts with credit limits over $1,000 for one of your sales reps (John Davis). Further, you want the accounts listed in descending (highest to lowest) order based on their credit limit (for those accounts with the same credit limit, you want them shown alphabetically by company name). To design such a query, you would follow these steps:
- Start with an empty QBE grid.
- Use the Query Type tool to make sure a Select Query is being designed. (It should be, by default.)
- In the field list, double-click your mouse on the Active field name. Access displays this field name in the first column of the QBE grid.
- In the Criteria row for the first column, enter the equation = Yes. This tells Access you want only those records with the Active field set to Yes.
- Clear the check box in the Show row for the first column. This tells Access not to display the value of this field.
- In the field list, double-click your mouse on the Salesperson field name. Access displays this field name in the second column of the QBE grid.
- In the Criteria row for the second column, enter the equation = "John Davis". This tells Access you want only those records that have noted John Davis as the sales representative.
- Clear the check box in the Show row for the second column. This tells Access not to display the value of this field.
- Double-click your mouse on the Credit Limit field name. Access displays this field name in the third column of the QBE grid.
- In the Sort row for the third column, choose Descending.
- In the Criteria row for the third column, enter the equation > 1000. This indicates you want only those records with credit limits over $1,000.
- Double-click your mouse on the Company Name field name. Access displays this field name in the fourth column of the QBE grid.
- In the Sort row for the fourth column, choose Ascending.
- Double-click your mouse on the Contact field name. Access displays this field name in the fifth column of the QBE grid.
- Double-click your mouse on the Contact Phone field name. Access displays this field name in the sixth column of the QBE grid.
- Double-click your mouse on the Last Order field name. Access displays this field name in the seventh column of the QBE grid.
You are now done with the query. Your query Design window should look like what is shown in Figure 6-22.
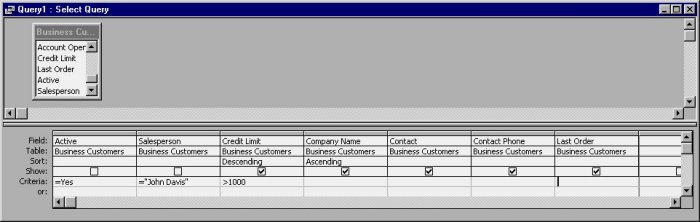
Figure 6-22 The completed query.
This query displays five fields from the Business Customers table, but only for those records that meet your criteria. You can save the query right away, if you desire. It may be better, however, to see the results of your query. To do so, click your mouse on the Run tool on the toolbar. Access runs the query, without saving it, and displays the results. This way you can check your work to see if the result is what you expected. Figure 6-23 shows the results of your new query.
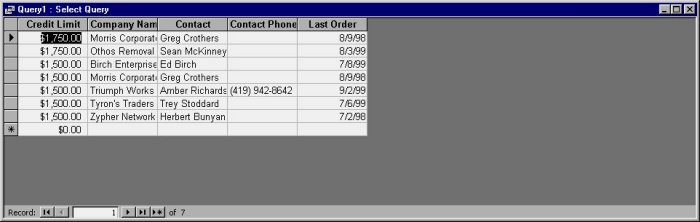
Figure 6-23 Query results.
When you finish examining the query results, you can use the View tool (left side of the toolbar) to switch back to the query Design window. You can then save your query by closing the Design window. At this point, Access asks if you want to save your query. Click your mouse on the Yes button, and Access prompts you for a name to use (see Figure 6-24).
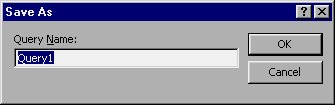
Figure 6-24 You can save your query using whatever name desired.
Enter the name you want Access to use for the query. In this case, you may want to enter the name Active Davis Accounts Over $1000. When you click your mouse on the OK button, Access saves the query and updates the Database window to reflect the addition of the new name.
Setting Properties
In Chapter 3, "Taking a Closer Look," you learned about field properties and how they can affect your Datasheet. The properties described in Chapter 3 apply to fields in a table, but you can also set properties for fields in a query. Query properties affect how Access displays the information the query derives, as well as how you can edit that information.
To see the properties for a particular field, select the field in the QBE grid. Then, click your mouse on the Properties tool. Access displays a Properties window; the exact appearance of the window will depend on the data type of the field. A sample Properties window is shown in Figure 6-25. (These properties are for the Credit Limit field.)
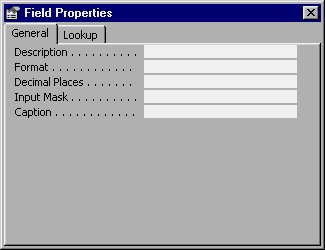
Figure 6-25 The Properties window for the Credit Limit field.
Notice that there are fewer properties than you would see in the table Design window. The properties shown, however, function exactly the same way as they do when you work with tables. (You may want to refer back to Chapter 3 for a refresher.)
Learn Access Now! Chapter 5 Previous Section in Chapter 6 Next Section in Chapter 6 Chapter 7